1. 서론
This manual provides essential information for the proper setup, operation, and maintenance of your Dual DAB 2 A DAB/DAB+ Radio Adapter. Please read these instructions carefully before using the device to ensure optimal performance and safety. The Dual DAB 2 A allows you to upgrade your existing stereo system with digital radio reception (DAB/DAB+) and traditional FM radio.
2. 안전 정보
- 전원: 지정된 전원 어댑터만 사용하세요. 볼륨을 확인하세요.tage는 장치의 요구 사항과 일치합니다.
- 물과 습기: 기기를 비, 습기 또는 액체가 떨어지거나 튀는 곳에 노출시키지 마십시오. 꽃병 등 액체가 담긴 물건을 기기 위에 올려놓지 마십시오.
- 통풍: 충분한 환기를 유지하세요. 환기구를 막지 마세요.
- 열: 라디에이터, 난방 장치, 스토브 또는 기타 장치(예: 열원)에서 장치를 멀리 두십시오. amp열을 생성하는 발전기.
- 청소: 청소하기 전에 기기의 전원 플러그를 뽑으십시오. 부드럽고 마른 천을 사용하십시오. 액체 세척제나 스프레이형 세척제는 사용하지 마십시오.
- 서비스: 이 제품을 직접 수리하려고 하지 마십시오. 모든 서비스는 자격을 갖춘 서비스 담당자에게 문의하십시오.
3. 패키지 내용
아래 나열된 모든 품목이 패키지에 포함되어 있는지 확인하세요.
- Dual DAB 2 A Radio Adapter
- 전원 어댑터
- External Antenna (wire with connector)
- 원격 제어
- 사용 설명서 (본 문서)
4. 제품 오버view
4.1 전면 패널
The front panel features the main display and controls for operating the device.

이미지 4.1: 앞쪽 view of the Dual DAB 2 A radio adapter. The display shows the current time (14:28) and the selected station ("Senderliste #Galaxy"). The "DAB+" logo is visible at the top left, and "Dual" is printed at the bottom center.

이미지 4.2: 각진 앞면 view of the Dual DAB 2 A, providing a clearer look at the illuminated multi-line LCD display and the device's compact design.
4.2 후면 패널 및 연결
The rear panel contains all necessary connection ports for power, antenna, and audio output.

이미지 4.3: 뒤쪽 view of the Dual DAB 2 A. From left to right, the ports are: 라인 아웃 (3.5mm audio jack), 직류 6.0V=0.5A (power input), 안테나 (coaxial connector for external antenna), and 힘 단추.

이미지 4.4: 옆 view of the Dual DAB 2 A, illustrating its compact and slightly curved profile.

이미지 4.5: 각진 측면 view showing the rear connections, including the Line Out, DC power input, and antenna port.
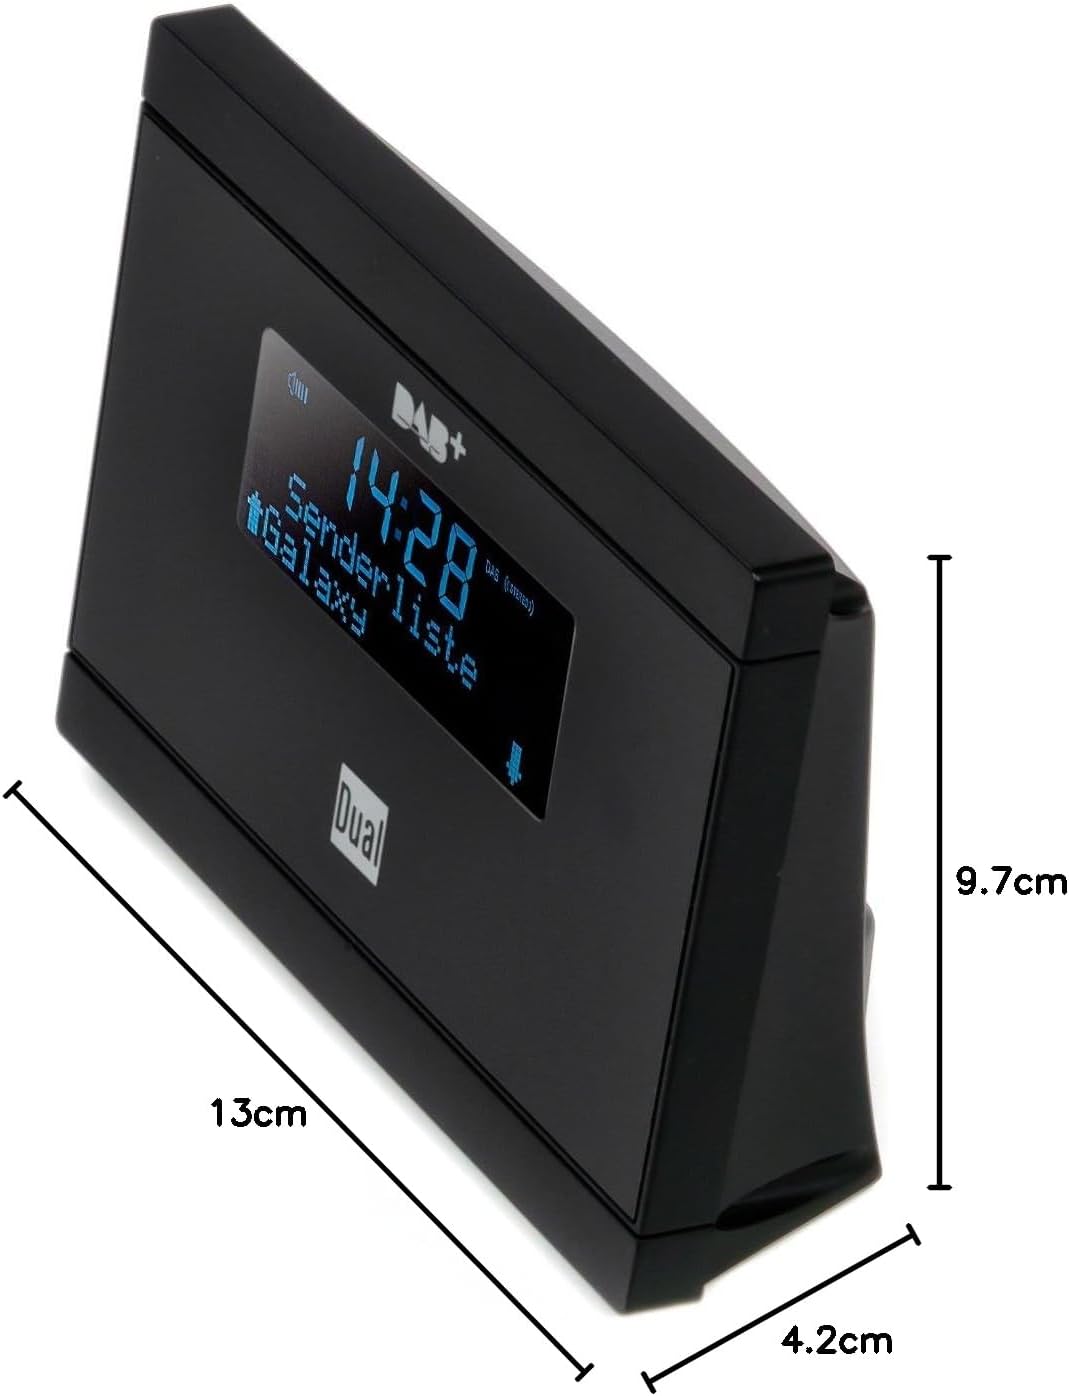
이미지 4.6: Dimensions of the Dual DAB 2 A: 13 cm (length), 4.2 cm (width), and 9.7 cm (height).
5. 설정
5.1 안테나 연결
- 위치 안테나 port on the rear of the DAB 2 A.
- Connect the supplied external wire antenna to this port.
- For optimal reception, position the antenna away from other electronic devices and metallic objects. You may also connect a commercially available external antenna for improved signal quality.
5.2 Connecting to your Stereo System
- 위치 라인 아웃 (3.5mm jack) on the rear of the DAB 2 A.
- Connect an audio cable (not supplied) from the 라인 아웃 of the DAB 2 A to an available audio input (e.g., AUX IN, LINE IN) on your existing stereo system or audio device.
5.3 전원 연결
- 제공된 전원 어댑터를 연결하십시오. 직류 6.0V=0.5A port on the rear of the DAB 2 A.
- 전원 어댑터를 적합한 벽면 콘센트에 꽂으세요.
6. 사용 설명서
6.1 전원 켜기/끄기
를 누르세요 힘 button on the rear of the device or on the remote control to turn the unit on or off.
6.2 초기 스캔 (DAB/DAB+)
Upon first power-on, the device will automatically perform a scan for available DAB/DAB+ stations. This process may take a few minutes. Once complete, the first available station will begin playing.
6.3 Switching Between DAB/DAB+ and FM
사용하세요 방법 button on the remote control or the device (if available) to switch between DAB/DAB+ and FM radio modes.
6.4 Tuning and Station Selection
- 댑/댑+: 사용하세요 위/아래 arrow buttons on the remote control or device to navigate through the list of available digital stations.
- FM: FM 모드에서는 다음을 사용합니다. 위/아래 arrow buttons to manually tune frequencies or initiate an automatic scan for the next available station.
6.5 사전 설정 저장 및 호출
The DAB 2 A allows you to store up to 20 favorite stations (DAB/DAB+ and FM combined).
- 저장하려면: 원하는 방송국에 맞추려면 버튼을 길게 누르세요. 사전 설정 button (or similar, refer to remote control layout) until the display shows a preset number. Use the arrow buttons to select a preset number (1-20) and confirm.
- 리콜하려면 : 를 누르세요 사전 설정 button briefly, then use the arrow buttons to select the desired preset station.
6.6 Clock, Alarm, and Sleep Functions
The device features a clock, alarm, and sleep timer. Refer to the detailed instructions in the full manual for setting these functions. The alarm can be set to wake you with DAB, FM, or a buzzer sound.
7. 유지관리
- 청소: Always unplug the device before cleaning. Use a soft, dry, lint-free cloth to wipe the surfaces. Do not use abrasive cleaners, waxes, or solvents.
- 저장: 장시간 사용하지 않을 경우 기기의 플러그를 뽑고 서늘하고 건조한 곳에 보관하세요.
8. 문제 해결
| 문제 | 가능한 원인 | 해결책 |
|---|---|---|
| 전원이 없습니다 | 전원 어댑터가 연결되지 않았거나 콘센트에 결함이 있습니다. | 전원 어댑터가 장치에 안전하게 연결되어 있고 전원 콘센트가 제대로 작동하는지 확인하세요. |
| 소리가 나지 않습니다 | Audio cable not connected, incorrect input selected on stereo, or volume too low. | Check audio cable connection. Select the correct input on your stereo system. Increase volume on both the DAB 2 A and your stereo. |
| Poor DAB/DAB+ reception or no stations found | Weak signal, antenna not properly connected or positioned. | Ensure the antenna is securely connected and positioned for optimal reception. Try repositioning the antenna. Consider using a higher-gain external antenna. Perform a full scan for stations. |
| FM 수신 불량 | Weak signal, antenna not properly connected or positioned. | Extend and reposition the wire antenna. Try a different antenna if available. |
| 리모컨이 작동하지 않습니다 | Batteries are dead or incorrectly inserted, or line of sight is blocked. | Replace batteries with new ones, ensuring correct polarity. Remove any obstructions between the remote and the device. |
9. 사양
| 특징 | 세부 사항 |
|---|---|
| 상표 | 듀얼 |
| 모델 번호 | DAB 2 A |
| 색상 | 검은색 |
| 연결 기술 | Auxiliary (3.5mm Line Out) |
| 특별 기능 | DAB/DAB+ Radio, FM Tuner, Clock, Alarm, Sleep Function |
| 호환 장치 | Devices with 3.5 mm audio connector |
| 제품 크기(L x W x H) | 13cm x 4.2cm x 9.7cm |
| 튜닝 기술 | FM, DAB, DAB+ |
| 전원 | Electric Cable (DC 6.0V=0.5A) |
| 지원되는 라디오 대역 | FM, DAB, DAB+ |
| 품목 무게 | 200그램 |
10. 보증 및 지원
For warranty information and technical support, please refer to the documentation provided with your purchase or contact Dual customer service. Keep your proof of purchase for any warranty claims.