
1. 서론
This manual provides detailed instructions for the installation, configuration, operation, and maintenance of your D-Link DNS-320L Cloud Storage 2-Bay Network Attached Storage (NAS) device. Please read this manual thoroughly before using the device to ensure proper setup and optimal performance. The DNS-320L is designed to provide a centralized storage solution for your home or small office network, offering data redundancy, remote access, and media streaming capabilities.
2. 안전 정보
- 우발적인 낙하를 방지하기 위해 장치가 안정적이고 평평한 표면에 놓여 있는지 확인하세요.
- 기기를 물, 습기 또는 극한 온도에 노출시키지 마세요.
- Use only the power adapter supplied with the device. Using an incorrect adapter may damage the device and void the warranty.
- 장치를 열지 마십시오.asing. 모든 서비스는 자격을 갖춘 담당자에게 의뢰하세요.
- 과열을 방지하려면 환기구를 깨끗하게 유지하십시오.
- 기기를 청소하거나 이동하기 전에 전원 케이블을 분리하십시오.
3. 패키지 내용
패키지에 다음 품목이 포함되어 있는지 확인하십시오.
- D-Link DNS-320L Cloud Storage 2-Bay NAS Enclosure
- 전원 어댑터
- 이더넷 케이블
- 빠른 설치 가이드
- Resource CD (may include software and full manual)
If any items are missing or damaged, please contact your retailer or D-Link support.
4. 신체적 이상view
Familiarize yourself with the ports, buttons, and indicators on your DNS-320L device.
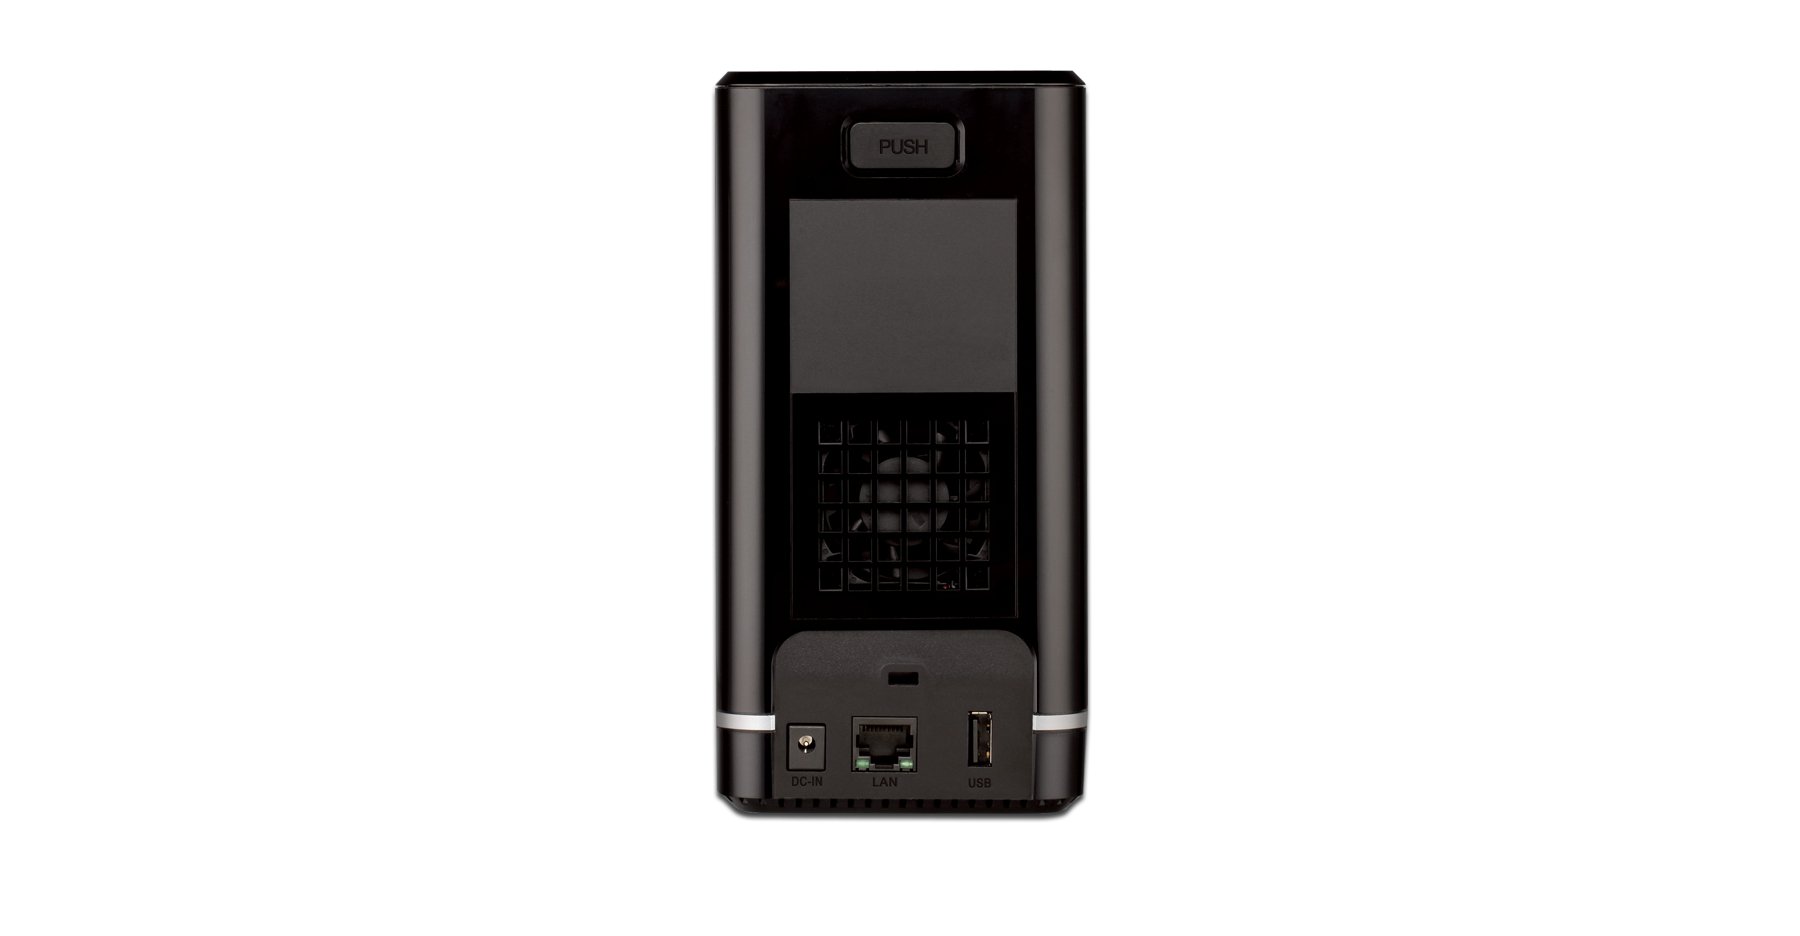
그림 4.1: 전면 View of D-Link DNS-320L. This image displays the front panel of the DNS-320L, typically showing LED indicators for power, network activity, and hard drive status. It may also feature a power button and a USB port for quick access.
4.1 전면 패널
- 전원 LED: 전원 상태를 나타냅니다.
- HDD 1/2 LEDs: Indicate hard drive activity and status for each bay.
- USB 포트: For connecting external USB storage devices or printers.
- 전원 버튼: 장치의 전원을 켜거나 끕니다.
4.2 후면 패널
- 기가비트 이더넷 포트: Connects the NAS to your network router or switch.
- 전원 커넥터 : 전원 어댑터를 연결합니다.
- 재설정 버튼: 공장 초기 설정으로 복원하는 데 사용됩니다(클립이나 이와 유사한 뾰족한 물체가 필요합니다).
- 켄싱턴 잠금 슬롯: 물리적 보안을 위해서입니다.
5. 하드웨어 설치
This section guides you through installing hard drives and connecting the DNS-320L to your network.
5.1 하드 드라이브 설치
The DNS-320L supports two 3.5-inch SATA hard drives. Ensure your drives are compatible and unformatted for initial setup.
- Ensure the DNS-320L is powered off and disconnected from the power outlet.
- Gently slide open the front cover of the NAS enclosure.
- Slide each hard drive into an available bay until it clicks into place, ensuring the SATA connectors align properly. No screws are typically required for tool-less installation.
- 전면 커버를 단단히 닫으세요.
Figure 5.1: Hard Drive Installation. This image illustrates the process of inserting a 3.5-inch SATA hard drive into one of the bays of the DNS-320L, highlighting the tool-less design.
5.2 Connecting the NAS to Your Network
- Connect one end of the Ethernet cable to the Gigabit Ethernet port on the rear of the DNS-320L.
- 이더넷 케이블의 다른 쪽 끝을 라우터나 네트워크 스위치의 사용 가능한 LAN 포트에 연결합니다.
- Connect the power adapter to the power connector on the rear of the DNS-320L, then plug the adapter into a power outlet.
- Press the Power button on the front panel to turn on the device. The Power LED will illuminate, and the HDD LEDs will flash during startup.
6. 초기 설정
After hardware installation, you will need to configure the DNS-320L using its web기반 관리 인터페이스.
6.1 액세스 Web 인터페이스
- Ensure your computer is connected to the same network as the DNS-320L.
- 열기 web 브라우저(예: Chrome, Firefox, Edge).
- The DNS-320L typically obtains an IP address automatically via DHCP. You can use the D-Link ShareCenter Utility (if provided on the Resource CD or D-Link website) to discover its IP address. Alternatively, try accessing
http://dlinksharecenterorhttp://dlinksharecenter.local. - 기본 사용자 이름을 입력하세요(일반적으로
admin) and leave the password blank (oradmin) to log in for the first time. You will be prompted to change the password.
6.2 Running the Setup Wizard
Upon first login, a setup wizard will guide you through essential configurations:
- Disk Volume Creation: You will be prompted to create a disk volume. Options typically include:
- 기준: Each drive is treated as a separate volume.
- RAID 0 (스트라이핑): Combines drives for maximum capacity and performance, but offers no data redundancy. If one drive fails, all data is lost.
- RAID 1(미러링): Mirrors data across both drives, providing data redundancy. If one drive fails, data is preserved on the other. Capacity is limited to the size of one drive.
- JBOD(Just a Bunch Of Disks): Combines drives into a single large volume sequentially. No performance or redundancy benefits.
Choose RAID 1 for data protection. RAID 0 offers speed but no protection.
- User Account Creation: Create at least one user account with administrative privileges.
- 네트워크 설정: Confirm or adjust network settings (DHCP or static IP).
- 시간대: 올바른 날짜와 시간을 설정하세요.
7. Operating the DNS-320L
This section covers common operational tasks for your NAS.
7.1 Accessing Shared Folders
After setup, shared folders will be accessible from your network:
- 윈도우: 열려 있는 File Explorer, type
\DNS-320L(or its IP address) in the address bar, and press Enter. - 맥 OS : In Finder, go to 이동> 서버에 연결, 유형
smb://DNS-320L(or its IP address), and click Connect. - 리눅스: 사용해보세요 file manager's network browsing feature or mount the share using SMB/CIFS.
7.2 User and Group Management
Manage who can access your NAS and what permissions they have:
- 에 로그인하세요 web interface as an administrator.
- 로 이동 Management > User Management or similar section.
- Create new users, assign passwords, and add them to groups.
- Configure folder permissions for users and groups (Read/Write, Read Only, No Access).
7.3 Cloud Access and Remote Management
The DNS-320L supports D-Link's Cloud features for remote access.
- Register your device with the D-Link Cloud service (if applicable, refer to D-Link's official documentation for specific steps).
- Use the D-Link mobile app (e.g., mydlink ShareCenter) to access files remotely from your smartphone or tablet.
- Configure port forwarding on your router if direct remote access to the web interface is desired (advanced users only, consult your router manual).
7.4 USB Device Functionality
The USB 2.0 port on the front panel can be used for:
- 외부 저장소: Connect USB hard drives or flash drives to expand storage or for backup purposes. These devices will appear as shared folders.
- USB Printer: Connect a compatible USB printer to share it across your network.
8. 유지관리
Regular maintenance ensures the longevity and reliability of your DNS-320L.
8.1 펌웨어 업데이트
Periodically check for and install firmware updates from the D-Link support website. Firmware updates can provide new features, performance improvements, and security patches.
- 최신 펌웨어를 다운로드하세요 file for your DNS-320L model from the official D-Link support site.
- Log in to the NAS web interface as an administrator.
- 로 이동 Management > Firmware Upgrade or a similar section.
- 다운로드한 펌웨어를 찾아보세요. file and initiate the upgrade process. Do not power off the device during the update.
8.2 데이터 백업
While RAID 1 provides redundancy against a single drive failure, it is not a substitute for a comprehensive backup strategy. Regularly back up critical data from your NAS to an external drive or another storage location.
8.3 청소
Keep the device clean to ensure proper airflow and prevent dust buildup.
- 청소하기 전에 장치의 전원을 끄고 플러그를 뽑으십시오.
- 부드럽고 마른 천으로 외부를 닦으세요.
- 압축 공기를 사용하여 환기구의 먼지를 제거하십시오.
9. 문제 해결
This section addresses common issues you might encounter with your DNS-320L.
| 문제 | 가능한 해결책 |
|---|---|
| 장치의 전원이 켜지지 않습니다. | Ensure the power adapter is securely connected to both the device and a working power outlet. Test the outlet with another device. |
| Cannot access the NAS on the network. | Verify the Ethernet cable is properly connected. Check network settings on your computer and router. Ensure the NAS has an IP address (use the D-Link utility). Try restarting the NAS and your router. |
| Hard drive LED is red or flashing abnormally. | This may indicate a drive error or failure. Check the NAS web interface for drive status. If a drive has failed in a RAID 1 configuration, replace the faulty drive and rebuild the array. |
| 관리자 비밀번호를 잊어버렸습니다. | Use the reset button on the rear panel to restore factory default settings. Warning: This will erase all configurations, but typically not data on the drives. You will need to reconfigure the NAS. |
| 느린 file 전송 속도. | Ensure all network components (NAS, router, computer) support Gigabit Ethernet. Check for network congestion or faulty cables. |
10. 사양
Key technical specifications for the D-Link DNS-320L:
| 특징 | 세부 사항 |
|---|---|
| 모델 번호 | DNS-320L |
| 드라이브 베이 | 2 x 3.5-inch SATA I/II/III HDD |
| RAID 지원 | Standard, JBOD, RAID 0, RAID 1 |
| 네트워크 인터페이스 | 1 x 기가비트 이더넷(10/100/1000Mbps) |
| USB 포트 | 1개의 USB 2.0 |
| 하드웨어 플랫폼 | 맥, PC |
| 치수(길이x너비x높이) | 3.54 x 5.68 x 7.61 인치 |
| 품목 무게 | 1.39 pounds (without drives) |
| 색상 | 검은색 |
| 재료 | 금속 |
| 호환 장치 | CPU, Desktop, Laptop, Server |
11. 보증 및 지원
For warranty information, please refer to the warranty card included with your product or visit the official D-Link website. D-Link provides technical support and resources to assist you with your DNS-320L.
- 온라인 지원: 방문하다 www.dlink.com/support for FAQs, troubleshooting guides, firmware downloads, and product documentation.
- 기술 지원: Contact D-Link technical support for assistance with installation, configuration, or troubleshooting issues that cannot be resolved using this manual or online resources. Contact details are available on the D-Link support web귀하의 지역에 대한 사이트.