1. 서론
This manual provides essential information for the safe and effective use of your Nikon COOLPIX S9100 digital camera. Please read this manual thoroughly before using the camera and keep it accessible for future reference.
2. 안전 정보
To prevent damage to your Nikon COOLPIX S9100 and to avoid injury to yourself or others, please observe the following safety precautions:
- 카메라를 분해하거나 개조하지 마십시오.
- 카메라를 물과 습기로부터 멀리하십시오.
- 니콘에서 승인한 액세서리와 전원만 사용하십시오.
- 카메라를 극한 온도나 직사광선에 장시간 노출시키지 마십시오.
- 어린이의 손이 닿지 않는 곳에 보관하세요.
3. 언박싱 및 패키지 구성품
Verify that all items are present in the camera package:
- 니콘 쿨픽스 S9100 디지털 카메라
- AN-CP19 스트랩
- UC-E6 USB 케이블
- EG-CP16 오디오/비디오 케이블
- EN-EL12 충전식 리튬이온 배터리
- EH-69P AC 어댑터/충전기
- 니콘 View NX 2 CD-ROM
4. 카메라 오버view
Familiarize yourself with the main components of your Nikon COOLPIX S9100.
앞쪽 View
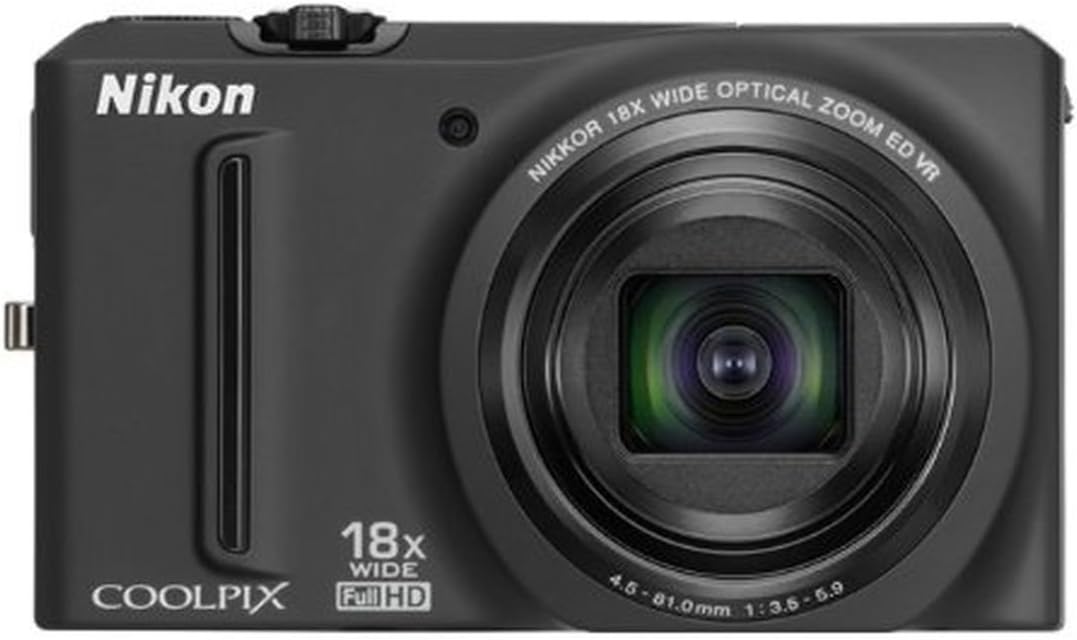
그림 4.1: 전면 view of the Nikon COOLPIX S9100 with the lens retracted, showing the Nikon branding, COOLPIX logo, 18x wide optical zoom lens, and 12.1-megapixel CMOS sensor indicator.
각진 View with Lens Extended

그림 4.2: 각도 view of the Nikon COOLPIX S9100, showcasing the camera with its 18x NIKKOR ED wide-angle optical zoom lens fully extended, highlighting its compact design.
5. 설정
5.1. 배터리 충전 및 삽입
The camera uses an EN-EL12 rechargeable Li-ion battery. Before first use, fully charge the battery using the EH-69P AC Adapter/Charger. Insert the charged battery into the battery compartment, ensuring correct orientation.
5.2. 메모리 카드 삽입
The COOLPIX S9100 supports SD/SDHC/SDXC memory cards. Open the memory card slot cover and insert the memory card until it clicks into place. Ensure the card is inserted in the correct direction to avoid damage.
6. 기본 동작
6.1. 전원 켜기/끄기
카메라 상단에 있는 전원 버튼을 눌러 전원을 켜거나 끄세요.
6.2. 사진 찍기
Select your desired shooting mode using the mode dial. Frame your shot using the 3-inch Clear Color Display. Press the shutter button halfway to focus, then press it fully to capture the image.
6.3. 줌 기능
Use the zoom lever around the shutter button to adjust the 18x optical zoom. Push it towards 'W' for wide-angle and 'T' for telephoto.
6.4. 플래시 사용하기
The camera features a built-in flash. Depending on the shooting mode, the flash may activate automatically or can be manually controlled via the flash mode settings.
7. 고급 기능
7.1. 장면 모드
The COOLPIX S9100 offers 19 optimized scene modes for various shooting situations. Use the mode dial to select 'SCENE' and then choose from options like Portrait, Landscape, Night Portrait, Night Landscape, and more. The Scene Auto Selector can also automatically detect the scene and apply the most appropriate settings.
7.2. 특수효과
Enhance your photos with in-camera special effects:
- Nostalgic Sepia: Creates a vintage, sepia-toned look.
- High-Contrast Monochrome: Produces striking black and white images.
- High Key / Low Key: Adjusts brightness to highlight bright or dark areas.
- 선별적인 색상: Retains a chosen color while converting the rest of the image to monochrome.
- Soft Effect: Softens harsh elements for a gentler appearance.
- Creative Slider: Adjusts brightness, intensity, and hue.
7.3. Full HD (1080p) Video Recording
Record Full HD 1080p videos with stereo sound using the dedicated One-Touch movie recording button. Optical zoom and autofocus are available during recording. You can also capture still images while recording or experiment with fast or slow motion effects.
비디오 7.3.1: 오버view of the Nikon COOLPIX S9100's features, including its compact design, 18x optical zoom, 12.1 MP CMOS sensor, and Full HD 1080p video capabilities. The video demonstrates the camera's ease of use for capturing various scenes and moments.
8. 재생 및 View잉
Review your photos and videos on the camera's 3-inch Ultra-High Resolution VGA (921,000-dot) Clear Color Display. Use the playback button to enter playback mode and the multi-selector to navigate through your media.
9. Connecting to a Computer/TV
Use the supplied UC-E6 USB Cable to connect your camera to a computer for transferring photos and videos. For viewing on a television, use the EG-CP16 Audio/Video Cable or an HDMI cable (sold separately) with the HDMI-CEC output.
10. 유지관리 및 관리
- 카메라 본체를 부드럽고 마른 천으로 닦으십시오.
- Use a blower brush to remove dust from the lens. For stubborn smudges, use a lens cleaning cloth.
- 사용하지 않을 때는 카메라를 서늘하고 건조한 곳에 보관하십시오.
- Regularly charge the battery, even if not in use, to maintain its lifespan.
11. 문제 해결
카메라에 문제가 발생하면 다음의 일반적인 해결 방법을 참조하십시오.
- 카메라가 켜지지 않습니다. 배터리가 충전되어 있고 올바르게 삽입되었는지 확인하십시오.
- 사진을 찍을 수 없습니다: Check if the memory card has sufficient space or is correctly inserted. Ensure the lens cap is removed.
- 이미지가 흐릿합니다. Verify that the camera is in focus. Use the image stabilization feature or a tripod in low light conditions.
- 플래시가 터지지 않습니다: Check flash settings to ensure it is enabled for the current shooting mode.
For more complex issues, consult the full digital manual on the supplied CD-ROM or contact Nikon customer support.
12. 사양
| 사진 센서 해상도 | 12.1 MP |
| 포토 센서 기술 | BSI CMOS |
| 광학 줌 | 18배 |
| 최대 초점 거리 | 450 밀리미터 |
| 최소 초점 거리 | 25 밀리미터 |
| 이미지 안정화 | 광학 |
| 비디오 해상도 | 풀HD 1080p |
| 화면 크기 | 3 인치 |
| 디스플레이 해상도 최대 | 921,000개의 점 |
| 지원됨 File 체재 | JPEG, RAW |
| 연결 기술 | HDMI, USB |
| 배터리 유형 | 리튬 이온(EN-EL12) |
| 배터리 평균 수명 | 270 사진 |
| 품목 무게 | 0.47 파운드 |
13. 보증 및 지원
For warranty information and customer support, please refer to the documentation included with your product or visit the official Nikon web사이트. 보증 청구를 위해 구매 증빙 자료를 보관하세요.