
소개
구매해주셔서 감사합니다asing the SENTRY CL933 Big Screen Weather Alarm Clock. This device combines a digital alarm clock with a large LCD display, providing essential information such as time, date, indoor temperature, humidity, and a weather forecast. This manual will guide you through the setup, operation, and maintenance of your new alarm clock.
안전 정보
- 제품을 극한 온도, 직사광선 또는 높은 습도에 노출시키지 마십시오.
- 기기를 떨어뜨리거나 강한 충격을 주지 마십시오.
- 오래된 건전지와 새 건전지, 다른 종류의 건전지를 혼용하지 마세요.
- 장치를 장기간 사용하지 않을 경우 배터리를 제거하십시오.
- 부드럽고 마른 천으로 제품을 닦으십시오. 연마성 세제나 용제를 사용하지 마십시오.
- 이 제품은 실내에서만 사용하세요.
패키지 내용
모든 항목이 있는지 확인하세요.
- SENTRY CL933 Big Screen Weather Alarm Clock
- 사용 설명서 (본 문서)
제품 끝view
The SENTRY CL933 features a large, easy-to-read LCD display and intuitive controls. Familiarize yourself with the main components:
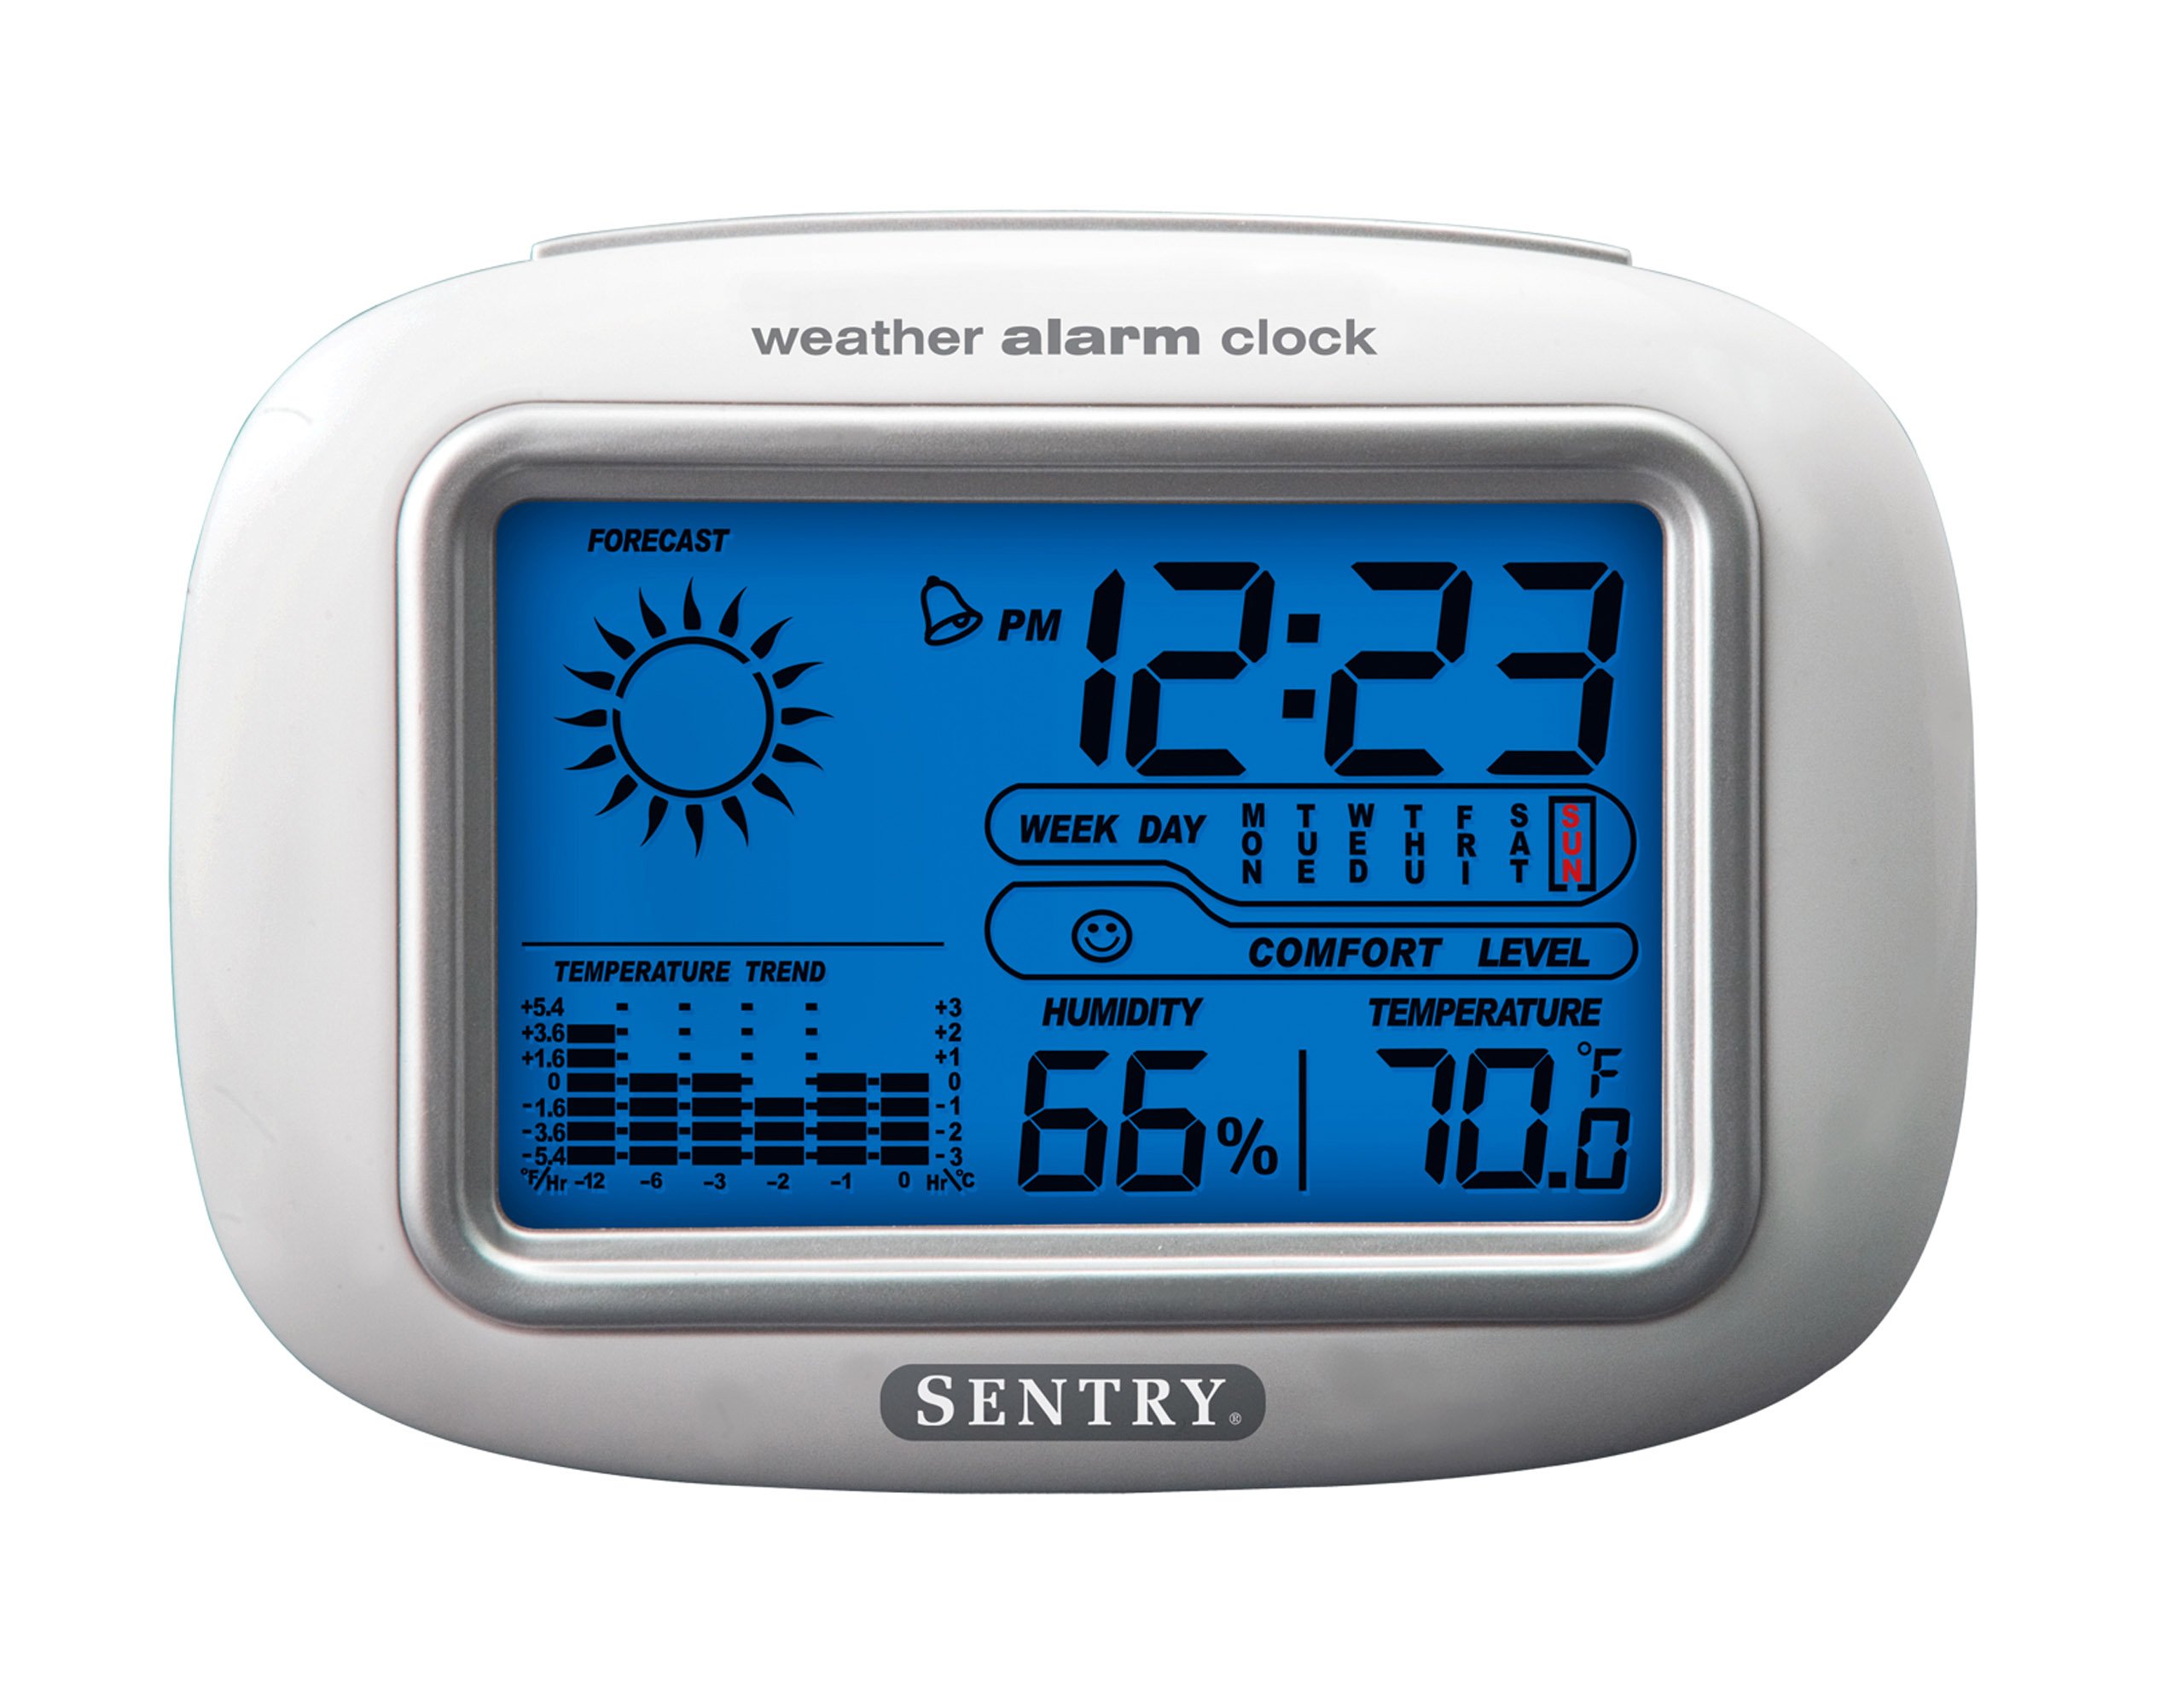
The SENTRY CL933 Big Screen Weather Alarm Clock displayed in its retail packaging, showing the clock face with time, weather forecast, humidity, and temperature readings.
디스플레이 요소:
- 시간 표시: Shows current time (12/24 hour format).
- 날짜 및 요일: 현재 날짜와 요일을 표시합니다.
- 일기예보 아이콘: Indicates predicted weather conditions (e.g., sunny, cloudy, rainy).
- Moon Phase Icon: Shows the current moon phase.
- 온도 표시 : 실내 온도를 섭씨 또는 화씨로 표시합니다.
- 습도 표시: Shows indoor humidity percentage.
- Comfort Level Icon: Indicates the comfort level based on temperature and humidity.
- 온도 추세 표시기 : Shows if the temperature is rising, falling, or stable over the last 12 hours.
- 알람 아이콘: Indicates when the alarm is set.
Control Buttons (typically on the back or sides):
- 모드/설정 버튼: 화면 모드를 전환하고 설정 모드로 들어가는 데 사용됩니다.
- 위/아래 버튼: Used to adjust values during setting and sometimes to toggle display options.
- 알람 버튼: 알람을 설정하거나 활성화/비활성화하는 데 사용됩니다.
- 스누즈/조명 버튼: Activates the backlight and functions as the snooze button when the alarm sounds.
- °C/°F 버튼: 섭씨와 화씨 온도 표시를 전환합니다.
설정
1. 배터리 설치
- 장치 뒷면에서 배터리 덮개를 찾으세요.
- 덮개를 밀거나 들어 올려서 제거하세요.
- Insert two (2) new AAA batteries (not included) according to the polarity indicators (+ and -) inside the compartment.
- 배터리함 덮개를 단단히 다시 닫으십시오.
- The clock will power on and the display will activate.
2. 초기 배치
Place the alarm clock on a stable, flat surface away from direct heat sources, strong vibrations, or areas with extreme temperature fluctuations for accurate readings.
작동 지침
1. 시간 및 날짜 설정
- 를 누르고 계세요 모드/설정 button for approximately 3 seconds to enter time setting mode. The hour digit will start flashing.
- 사용하세요 UP or 아래에 버튼으로 시간을 조정합니다.
- 누르다 모드/설정 again to confirm the hour and move to the minute setting.
- 2단계와 3단계를 분, 년, 월, 일에 대해 반복합니다.
- 날짜를 설정한 후 누르세요. 모드/설정 설정 모드를 종료하려면 마지막으로 한 번 더 입력하세요.
- To switch between 12-hour and 24-hour time format, press the UP 시간 설정 중 시간이 깜빡이는 동안 버튼을 누르십시오.
2. 알람 설정
- 를 누르세요 경보 버튼을 한 번 누르면 현재 알람 시간이 표시됩니다.
- 를 누르고 계세요 경보 button for approximately 3 seconds. The alarm hour digit will start flashing.
- 사용하세요 UP or 아래에 알람 시간을 조정하는 버튼입니다.
- 누르다 경보 again to confirm the hour and move to the alarm minute setting.
- 사용하세요 UP or 아래에 알람 분을 조정하는 버튼입니다.
- 누르다 경보 알람 설정 모드를 확인하고 종료하려면 마지막으로 한 번 더 클릭하세요.
- 알람을 활성화 또는 비활성화하려면 버튼을 누르십시오. 경보 button briefly when the current time is displayed. An alarm icon will appear on the display when the alarm is active.
3. 스누즈 기능 및 백라이트
- 알람이 울리면 버튼을 누르세요. 스누즈 / 라이트 button to activate the snooze function. The alarm will temporarily stop and sound again after a few minutes (typically 5-10 minutes).
- 알람을 완전히 끄려면 다른 버튼(예: 경보, 모드/설정) when the alarm is sounding.
- 를 누르세요 스누즈 / 라이트 button at any time to activate the backlight for a few seconds, illuminating the display for easy viewing in low light conditions. The backlight is not designed to stay on continuously to conserve battery life.
4. 온도 단위 선택(°C/°F)
를 누르세요 ° C / ° F button (usually located on the back or side) to toggle the temperature display between Celsius and Fahrenheit.
5. Understanding Weather and Environmental Displays
- 일기 예보: The icon (e.g., sun, clouds, rain) represents a prediction of the weather for the next 12-24 hours based on atmospheric pressure changes detected by the internal sensor. This is an estimate and may not always match official weather reports.
- 습기: Displays the current indoor relative humidity percentage.
- 편안함 수준: An icon (e.g., smiley face, neutral face, frowny face) indicates the indoor comfort level based on the combination of temperature and humidity.
- 기온 변화 추이: The arrow indicator shows if the indoor temperature has been rising, falling, or remaining stable over the past 12 hours.
- 문 페이즈: The moon icon changes to reflect the current phase of the moon.
유지
- 청소: 부드럽고 약간의 물티슈로 장치를 닦으십시오.amp 옷감. 가혹한 화학 물질이나 연마재를 사용하지 마십시오.
- 배터리 교체: When the display becomes dim or functions become erratic, replace the two AAA batteries. Ensure correct polarity.
- 저장: 장기간 시계를 보관할 경우, 배터리 누출을 방지하기 위해 배터리를 제거하세요.
문제 해결
| 문제 | 가능한 원인 / 해결책 |
|---|---|
| 디스플레이가 비어 있거나 어둡습니다. | Batteries are low or incorrectly installed. Replace with new AAA batteries, ensuring correct polarity. |
| 시간/날짜를 설정할 수 없습니다. | 버튼을 누른 상태로 유지하고 있는지 확인하십시오. 모드/설정 설정 모드로 들어가려면 버튼을 3초간 누르세요. |
| 알람이 울리지 않습니다. | The alarm may not be activated. Press the 경보 button briefly to ensure the alarm icon is displayed. Check alarm time setting. |
| 온도/습도 측정값이 부정확합니다. | The unit may be placed near a heat source, vent, or in direct sunlight. Move the clock to a more stable environment. Readings are for indoor conditions only. |
| 일기예보가 틀린 것 같습니다. | The weather forecast is an estimate based on internal barometric pressure changes and may not always align with local weather reports. It is a general trend indicator. |
명세서
- 모델: CL933
- 상표: 보초
- 디스플레이 유형: 백라이트가 있는 디지털 LCD
- 전원: 배터리 구동
- 필요한 배터리: AAA 2개(포함되지 않음)
- 치수: 6.5 x 2.25 x 4.25인치(16.5 x 5.7 x 10.8cm)
- 무게: 6.2 온스(176그램)
- 특징: Time, Date, Day of Week, Alarm, Snooze, Indoor Temperature (°C/°F), Indoor Humidity, Weather Forecast Icons, Moon Phase, Comfort Level Indicator, 12-hour Temperature Trend.
- 장착 유형: 테이블탑
보증 및 지원
SENTRY products are designed for reliability and performance. For any questions, technical support, or warranty inquiries, please refer to the contact information provided with your purchase or visit the official SENTRY web사이트. 보증 청구를 위해 구매 증빙 자료를 보관하세요.