
중요한 안전 정보
Please read and understand all safety warnings and instructions before assembling, operating, or servicing this gas smoker. Failure to follow these instructions could result in property damage, bodily injury, or death.
- 실외에서만 사용하십시오. 실내 또는 밀폐된 공간에서 사용하지 마십시오.
- 어린이와 애완동물이 항상 흡연자로부터 멀리 떨어지게 하십시오.
- Always operate the smoker on a level, non-combustible surface.
- 가연성 물질로부터 최소 10피트(3미터)의 거리를 유지하십시오.
- Never leave a lit smoker unattended.
- Use caution when handling hot surfaces. Always use heat-resistant gloves.
- 일산화탄소가 쌓이는 것을 방지하려면 적절한 환기를 유지하세요.
- Check all gas connections for leaks before each use using a soapy water solution.
- Only use propane gas with this appliance.
제품 끝view
The Landmann USA 3405GLA Smoky Mountain Gas Smoker is designed for efficient outdoor smoking with its two-drawer heat-saving system. This design allows for easy access to add wood chips and water without opening the main cooking chamber door, helping to maintain consistent internal temperatures.
주요 특징:
- Cool grip front door handle and drawer handles for safe operation.
- Heavy-duty side carrying handles for portability.
- Three adjustable chrome-plated cooking grates for versatile cooking space.
- Includes a porcelain-coated steel water pan and a cast iron wood chip box with lid.
- Wide stance legs provide enhanced stability.
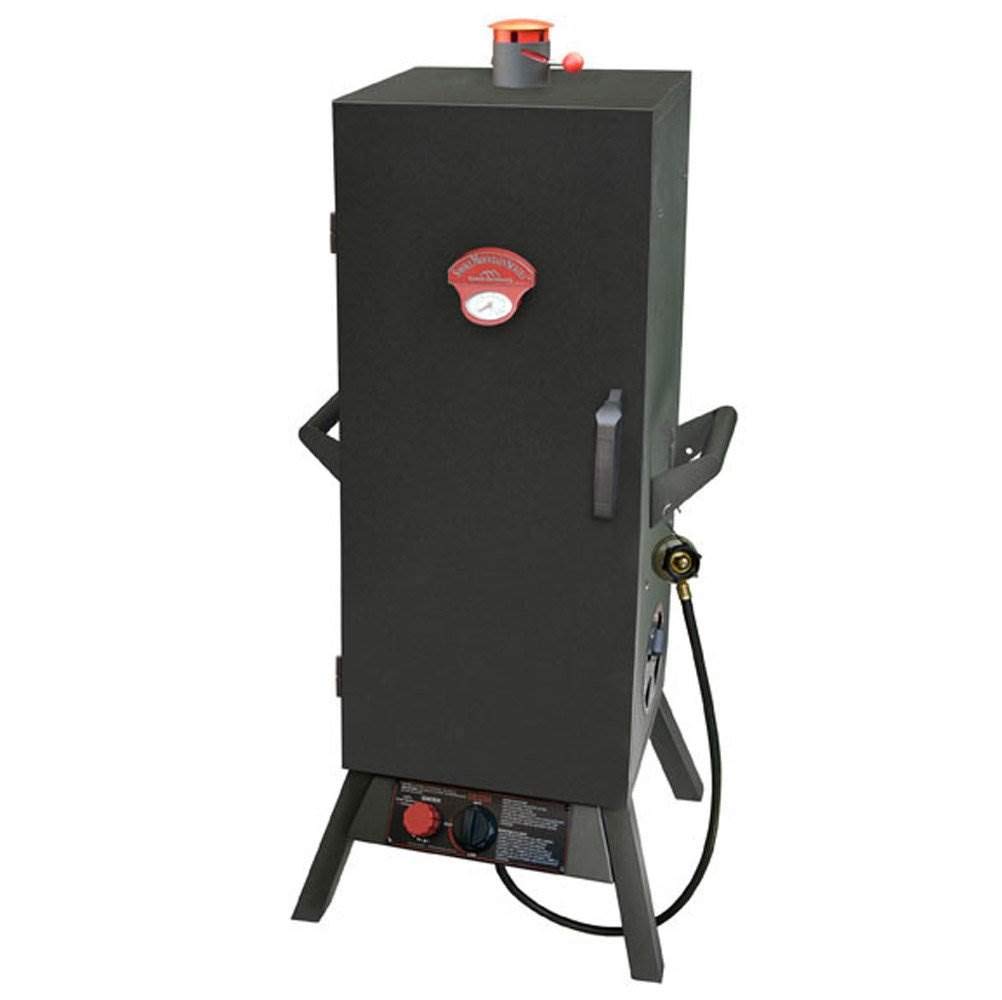
그림 1: 전면 view of the Landmann USA 3405GLA Gas Smoker with the lower drawer open, showing the wood chip box and water pan access.

그림 2: 정면 전체 view of the Landmann USA 3405GLA Gas Smoker, highlighting its compact design.

그림 3: 내부 view of the Landmann USA 3405GLA Gas Smoker, showing the adjustable cooking grates and capacity for various foods.
조립 설명서
Carefully unpack all components and ensure all parts are present before beginning assembly. Refer to the included assembly diagram (if applicable) for detailed steps. Typically, assembly involves attaching the legs, handles, and internal components such as cooking grates, water pan, and chip box.
- Attach the legs to the main body of the smoker using the provided hardware. Ensure they are securely fastened for stability.
- Install the side carrying handles and the front door handle.
- Place the adjustable chrome-plated cooking grates into their desired positions within the cooking chamber.
- Insert the porcelain-coated steel water pan and the cast iron wood chip box into the lower drawer assembly.
- Connect the gas hose and regulator to the smoker's gas inlet. Ensure all connections are tight.
- Perform a leak test on all gas connections using a soapy water solution. Bubbles indicate a leak. Tighten connections or replace parts as necessary.
설정
Proper setup is crucial for safe and effective smoking.
- 놓기: Position the smoker on a flat, stable, non-combustible surface outdoors. Ensure adequate clearance from walls, fences, and other combustible materials.
- 프로판 탱크 연결: Connect your propane tank to the regulator and then to the smoker's gas inlet. Hand-tighten the connection.
- 초기 연소: Before first use, operate the smoker empty for approximately 30-60 minutes at a medium temperature. This process burns off any manufacturing oils or residues.
작동 지침
Follow these steps for optimal smoking results.
- Prepare Wood Chips and Water: Soak wood chips in water for at least 30 minutes. Fill the water pan with water, juice, or other liquids to add moisture and flavor.
- Add Wood Chips and Water: Slide out the lower drawer. Place the soaked wood chips into the cast iron chip box and position the water pan. Close the drawer securely.
- Light the Burner: Open the main door. Turn the gas control knob to the 'LIGHT' or 'START' position and press the igniter button. Once lit, adjust the knob to the desired temperature setting.
- 예열 : Close the main door and allow the smoker to preheat to your target smoking temperature. Monitor the built-in thermometer.
- 음식 적재: Once preheated, carefully place your food on the cooking grates. Arrange food to allow for proper air circulation.
- 온도 유지: Adjust the gas control knob as needed to maintain a consistent temperature. The two-drawer system allows you to add more wood chips or water without opening the main door, which helps stabilize the internal temperature.
- 요리 모니터링: Use a separate meat thermometer to check the internal temperature of your food for doneness.
- 종료: When finished, turn the gas control knob to the 'OFF' position and close the valve on the propane tank.
유지
정기적인 청소와 관리는 훈제기의 수명을 연장시켜 줍니다.
- 매번 사용 후: Allow the smoker to cool completely. Remove and clean the cooking grates, water pan, and wood chip box with warm, soapy water.
- 내부 청소 : Scrape off any accumulated grease or food residue from the interior walls and bottom of the smoker. A stiff brush or scraper can be used.
- 외부 청소: 광고로 외부 표면을 닦아냅니다.amp 천으로 닦아주세요. 마감재를 손상시킬 수 있는 연마성 세제는 사용하지 마세요.
- 저장: Disconnect the propane tank and store it separately. Store the smoker in a dry, protected area, preferably covered, to prevent rust and weather damage.
- 가스 호스 점검: Periodically inspect the gas hose for any signs of wear, cuts, or kinks. Replace if damaged.
문제 해결
일반적인 문제와 해결 방법은 이 섹션을 참조하세요.
| 문제 | 가능한 원인 | 해결책 |
|---|---|---|
| Smoker not heating or low heat |
|
|
| Smoke leaking from doors |
|
|
| 점화 장치가 작동하지 않습니다 |
|
|
| Inaccurate thermometer reading |
|
|
명세서
- 상표: 란드만
- 모델: 3405GLA
- 전원: 프로판
- 색상: 검은색
- 겉감 소재 : Chrome, Steel, Iron
- 내부 소재: 스테인리스 스틸
- 품목 무게: 약 51.7파운드
- 한국어: 715117319593
보증 정보
Landmann will replace missing and defective parts within 90 days of purchase. Please retain your proof of purchase for warranty claims. For specific warranty details or to initiate a claim, refer to the documentation included with your product or contact Landmann customer support.
고객 지원
For assistance with assembly, operation, troubleshooting, or replacement parts, please contact Landmann customer support. Have your model number (3405GLA) and proof of purchase ready when contacting support.
Note: Specific contact information (phone number, web제품 정보(웹사이트)는 일반적으로 제품 포장이나 제조업체의 공식 웹사이트에 제공됩니다. web대지.


