1. 서론
This manual provides detailed instructions for the installation, operation, maintenance, and troubleshooting of the ASUS P7F-M Micro ATX Motherboard. Please read this manual thoroughly before installing or using the motherboard to ensure proper setup and functionality.
The ASUS P7F-M is designed for Intel Xeon 3400 series, Core i7, Core i5, and Core i3 processors with an LGA 1156 socket, supporting DDR3 memory and offering various expansion and connectivity options.
2. 설정 및 설치
Before beginning installation, ensure your system is powered off and disconnected from the power source. Wear an anti-static wrist strap to prevent electrostatic discharge (ESD) damage to components.
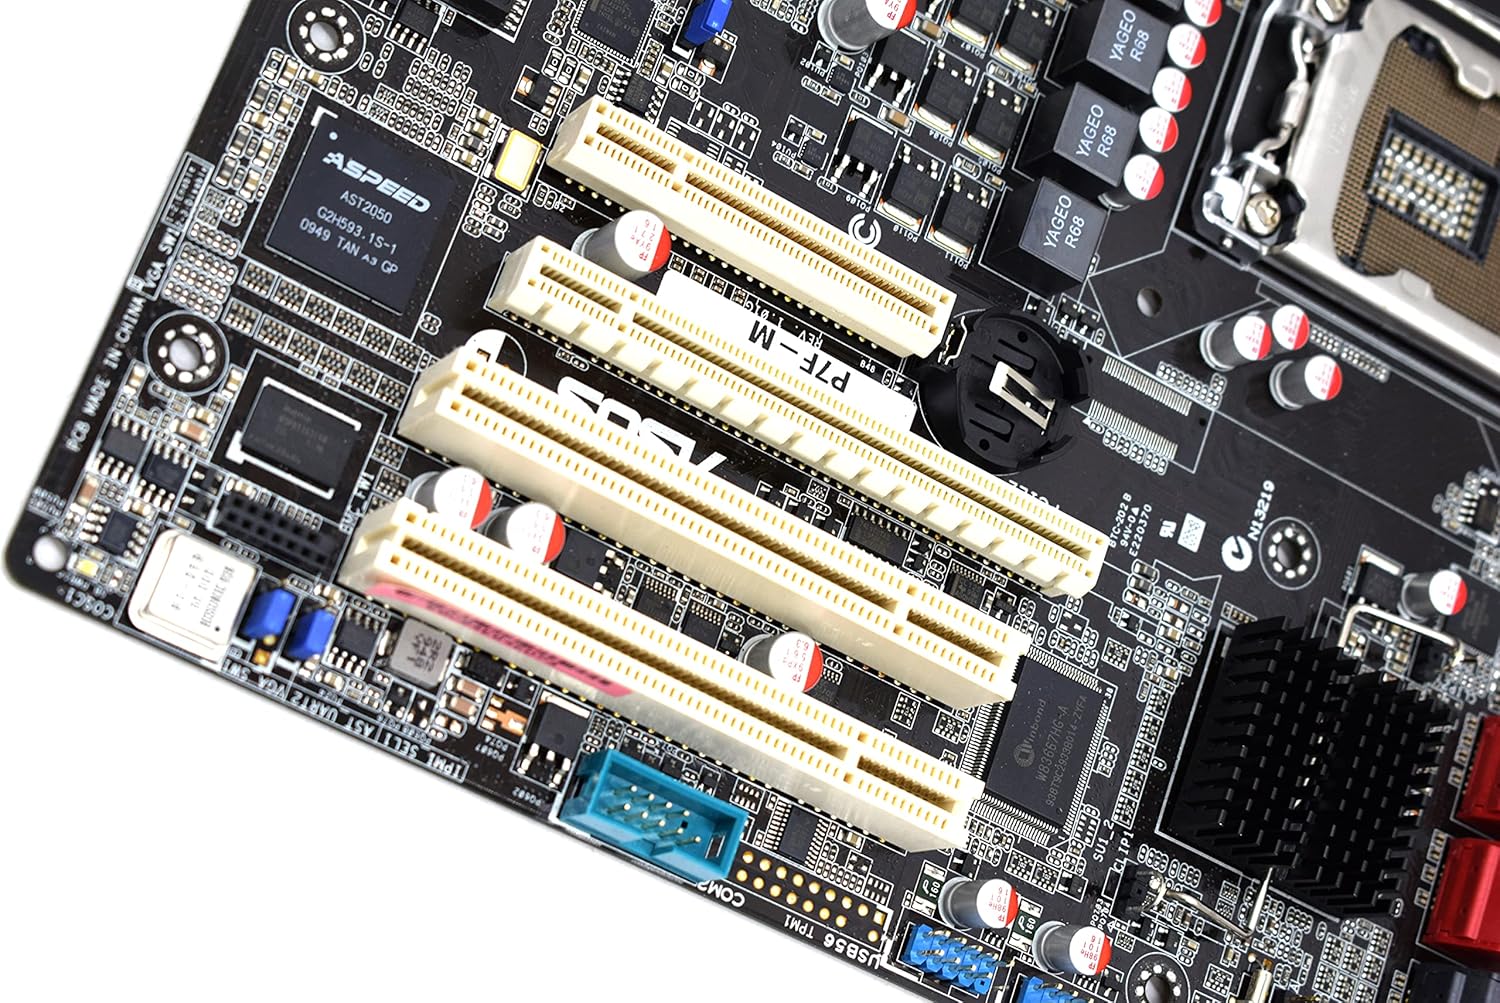
2.1 마더보드 레이아웃

이미지: 위에서 아래로 view of the ASUS P7F-M motherboard, showing the CPU socket, RAM slots, PCIe slots, and various connectors.

이미지: 각도 view of the ASUS P7F-M motherboard, highlighting the rear I/O panel, CPU socket, and expansion slots.
2.2 CPU 설치
- 마더보드에서 LGA 1156 CPU 소켓을 찾으세요.
- 로드 레버를 부드럽게 아래로 누른 다음 옆으로 당겨 소켓 고정 프레임을 엽니다.
- CPU의 금색 삼각형이 소켓의 삼각형과 일치하는지 확인하여 CPU를 소켓에 조심스럽게 맞춰 끼우십시오. CPU를 소켓에 억지로 끼워 넣지 마십시오.
- 고정 프레임을 닫고 하중 레버를 딸깍 소리가 날 때까지 제자리로 밀어 넣으십시오.

이미지: 클로즈업 view of the LGA 1156 CPU socket on the ASUS P7F-M motherboard, ready for processor installation.
2.3 메모리 설치
The motherboard supports 4x DDR3-1333/1066 DIMMs, with a maximum capacity of 16GB. It supports both ECC and non-ECC un-buffered memory.
- DIMM 슬롯의 양쪽 끝에 있는 클립을 엽니다.
- 메모리 모듈을 슬롯에 맞춰서 모듈의 홈이 슬롯의 키와 일치하는지 확인합니다.
- 클립이 제자리에 고정될 때까지 메모리 모듈의 양쪽 끝을 단단히 누릅니다.
이미지: 클로즈업 view of the four DDR3 DIMM slots on the ASUS P7F-M motherboard, showing their arrangement.
2.4 확장 카드 설치
메인보드의 특징은 다음과 같습니다.
- 1x PCI-Express x16 Slot
- 1x PCI-Express x8 Slot (operates at x4)
- 2x 32bit/33MHz PCI Slots
- Select an appropriate expansion slot for your card.
- Remove the corresponding metal slot cover from your PC case.
- 카드를 슬롯에 맞춰 넣고 단단히 고정될 때까지 꾹 눌러주세요.
- 카드를 나사로 PC 케이스에 고정합니다.

이미지: 클로즈업 view of the PCI Express and PCI expansion slots on the ASUS P7F-M motherboard.
2.5 저장 장치 연결
Connect your SATA storage devices (HDDs, SSDs, optical drives) to the SATA ports on the motherboard.

이미지: 클로즈업 view of the SATA ports on the ASUS P7F-M motherboard, typically located near the chipset.
2.6 전원 연결
Connect the 24-pin ATX main power connector and the 8-pin CPU power connector from your power supply unit (PSU) to the corresponding ports on the motherboard.
2.7 후면 패널 연결
주변 장치를 후면 I/O 포트에 연결합니다.
- USB 2.0 포트: For keyboards, mice, and other USB devices.
- PS/2 포트: For legacy PS/2 keyboards and mice.
- RJ45 LAN Ports: 네트워크 연결을 위해.
- 시리얼 포트 : 직렬 장치의 경우.
- VGA 포트: 모니터로 영상 출력을 위해.
3. 사용 설명서
3.1 초기 전원 켜기
After all components are installed and connected, connect the power cable to your PSU and press the power button on your PC case. The system should initiate the Power-On Self-Test (POST).
3.2 BIOS/UEFI 설정
POST 과정 중에 지정된 키(일반적으로)를 누르십시오. 델 or F2) to enter the BIOS setup utility. Here you can configure system settings, boot order, and monitor hardware status.
3.3 드라이버 설치
After installing your operating system, install the necessary drivers for the motherboard chipset, LAN, and any other integrated components. These drivers are typically provided on a support CD or available for download from the ASUS web대지.
4. 유지관리
4.1 청소
컴퓨터 내부를 정기적으로 청소하여 먼지 축적을 방지하세요. 먼지가 쌓이면 과열 및 부품 고장의 원인이 될 수 있습니다. 압축 공기를 사용하여 팬, 방열판 및 기타 부품의 먼지를 제거하십시오. 청소하기 전에 시스템 전원을 끄고 전원 케이블을 뽑으십시오.
4.2 BIOS 업데이트
정기적으로 ASUS 지원을 확인하세요 website for updated BIOS versions. BIOS updates can improve system stability, add support for new hardware, or fix bugs. Follow the instructions provided by ASUS carefully when performing a BIOS update to avoid system damage.
5. 문제 해결
If you encounter issues with your ASUS P7F-M motherboard, consider the following troubleshooting steps:
- 전원 없음: Ensure all power cables (24-pin ATX, 8-pin CPU) are securely connected. Verify the PSU is functioning correctly.
- 디스플레이 없음: Check that the monitor is connected to the correct video output (VGA on the motherboard or a dedicated graphics card). Reseat the graphics card and memory modules.
- 시스템 불안정성: This can be caused by incompatible memory, insufficient power, or overheating. Verify memory compatibility and check CPU/case fan operation.
- POST 비프음 코드: Listen for beep codes during startup. Refer to the ASUS website or a general BIOS beep code guide to diagnose the issue.
- Component Detection Issues: Ensure all components (CPU, RAM, expansion cards, storage drives) are properly seated and connected.
추가적인 도움이 필요하시면 ASUS 지원팀에 문의하십시오. web해당 웹사이트를 방문하거나 기술 지원팀에 문의하십시오.
6. 사양
Below are the detailed technical specifications for the ASUS P7F-M Motherboard:
| 특징 | 사양 |
|---|---|
| CPU 소켓 | LGA 1156 |
| 호환 프로세서 | Intel Quad Core Xeon 3400 series, Core i7-800, Core i5-700, Core i3 series |
| 칩셋 | Intel 3420 PCH Chipset |
| 메모리 슬롯 | 4x DDR3 DIMMs |
| 메모리 유형 | DDR3-1333/1066, Dual Channel, Un-buffered, ECC/non-ECC |
| 최대 메모리 용량 | 16GB |
| PCI-Express x16 슬롯 | 1 |
| PCI-Express x8 슬롯 | 1 (runs in x4 mode) |
| PCI 슬롯 | 2x 32bit/33MHz |
| 랜 컨트롤러 | Intel 82574L Dual Port Gigabit LAN controller, 1x Management LAN |
| USB 2.0 포트 | 7 (2 rear, 5 via header) |
| PS/2 포트 | 2 |
| RJ45 랜 포트 | 3 |
| 직렬 포트 | 2 (1 rear, 1 via header) |
| VGA 포트 | 1 |
| 주전원 커넥터 | 1x 24핀 |
| CPU 전원 커넥터 | 1x 8핀 |
| 폼 팩터 | 마이크로 ATX |
| 치수 | 13.3 x 11.1 x 3.1인치(패키지) |
| 품목 무게 | 1.5파운드 |
7. 보증 및 지원
For information regarding the product warranty, please refer to the warranty card included with your motherboard or visit the official ASUS website. ASUS provides technical support and resources, including driver downloads, FAQs, and contact information, on their support portal.
ASUS 지원 Web대지: https://www.asus.com/support/