
1. 서론
This manual provides detailed instructions for the installation, operation, and maintenance of your AZZA Solano 1000R CSAZ-1000R Full Tower Computer Case. Please read this manual thoroughly before beginning installation to ensure proper setup and to maximize the performance and longevity of your system components.
2. 제품 특징
- 최적화된 열 관리: Features multiple fans for superior cooling, including a 230mm top fan, a 230mm side fan, two 140mm front fans, and a 120mm rear fan.
- Bottom-Mounted Power Supply: Designed for improved thermal separation and stability, allowing installation facing up or down.
- 고급 케이블 관리: Pre-drilled motherboard tray and ample space behind for organized cable routing, enhancing airflow and aesthetics.
- Tool-Less Design: Thumb screws for easy installation of optical drives and hard disk drives.
- 편리한 전면 I/O: USB and audio ports, along with an eSATA port, located on the top panel for easy access.
- 넓은 실내: Full tower design accommodates large components, including extended graphics cards and tall CPU coolers.
- 미적 디자인: Black exterior with a vibrant red painted interior and red LED fans.
3. 패키지 내용
패키지에 모든 품목이 들어 있는지 확인하세요.
- AZZA Solano 1000R CSAZ-1000R Full Tower Case
- 액세서리 상자(나사, 스탠드오프, 케이블 타이 등이 들어 있음)
- 사용 설명서 (본 문서)
4. 구성요소 종료view
4.1 외부 Views
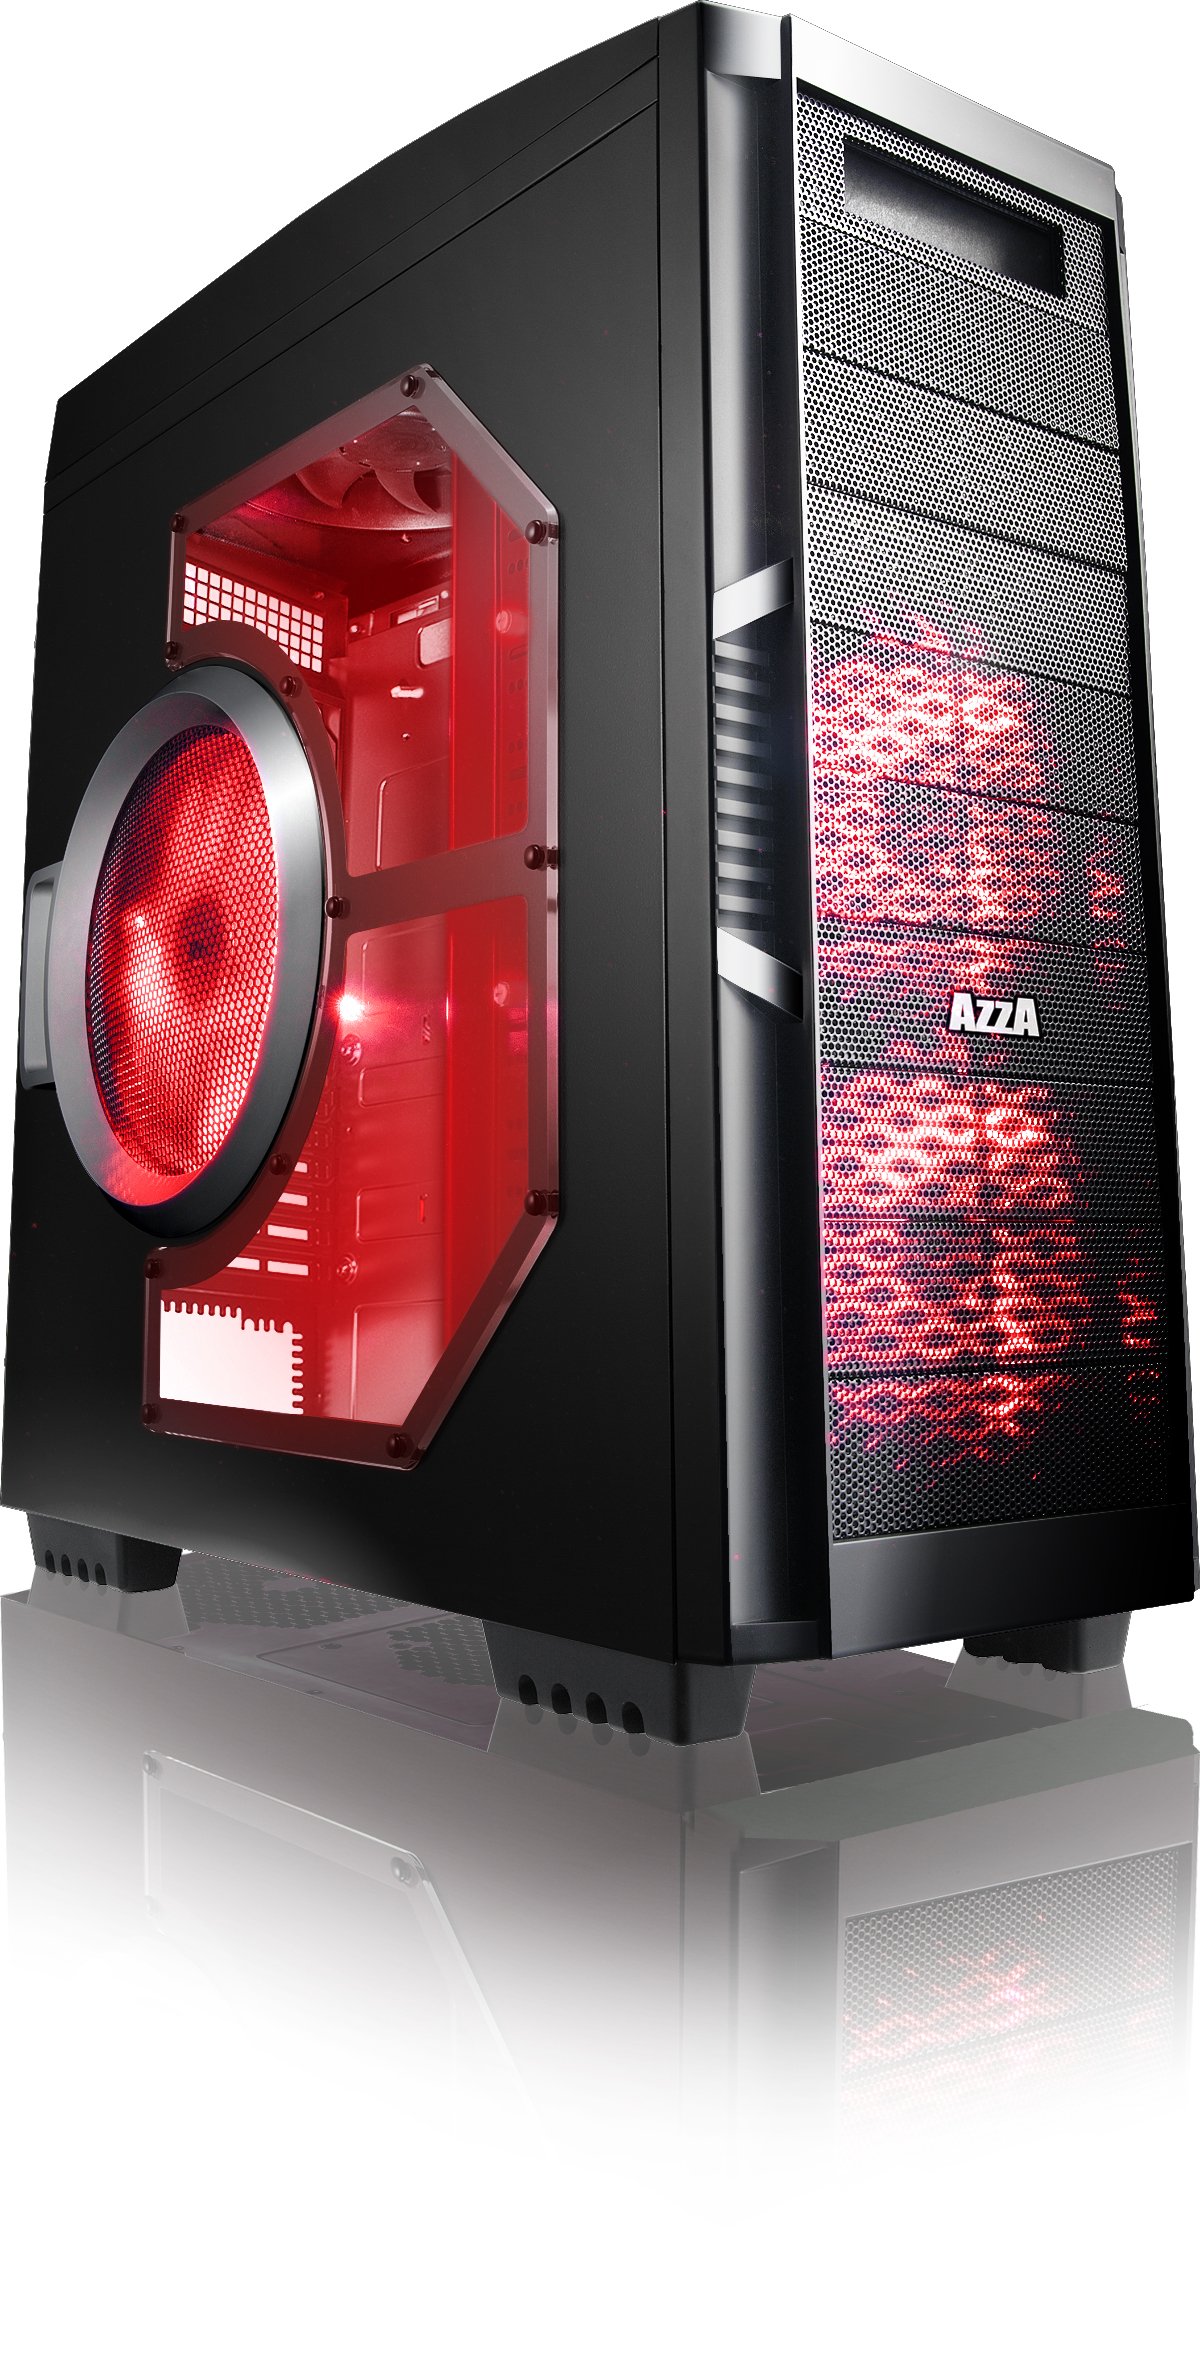
그림 4.1: 전면 view of the AZZA Solano 1000R case, showcasing the red LED fans on the front and side panel.

그림 4.2: 전면 view of the AZZA Solano 1000R case, highlighting the two 140mm red LED intake fans behind the mesh panel.

그림 4.3: 측면 view of the AZZA Solano 1000R case, showing the large 230mm red LED side panel fan and the transparent window.

그림 4.4: 상단 전면 각도 view of the AZZA Solano 1000R case, showing the top ventilation grille, front I/O panel with USB and audio ports, and power button.
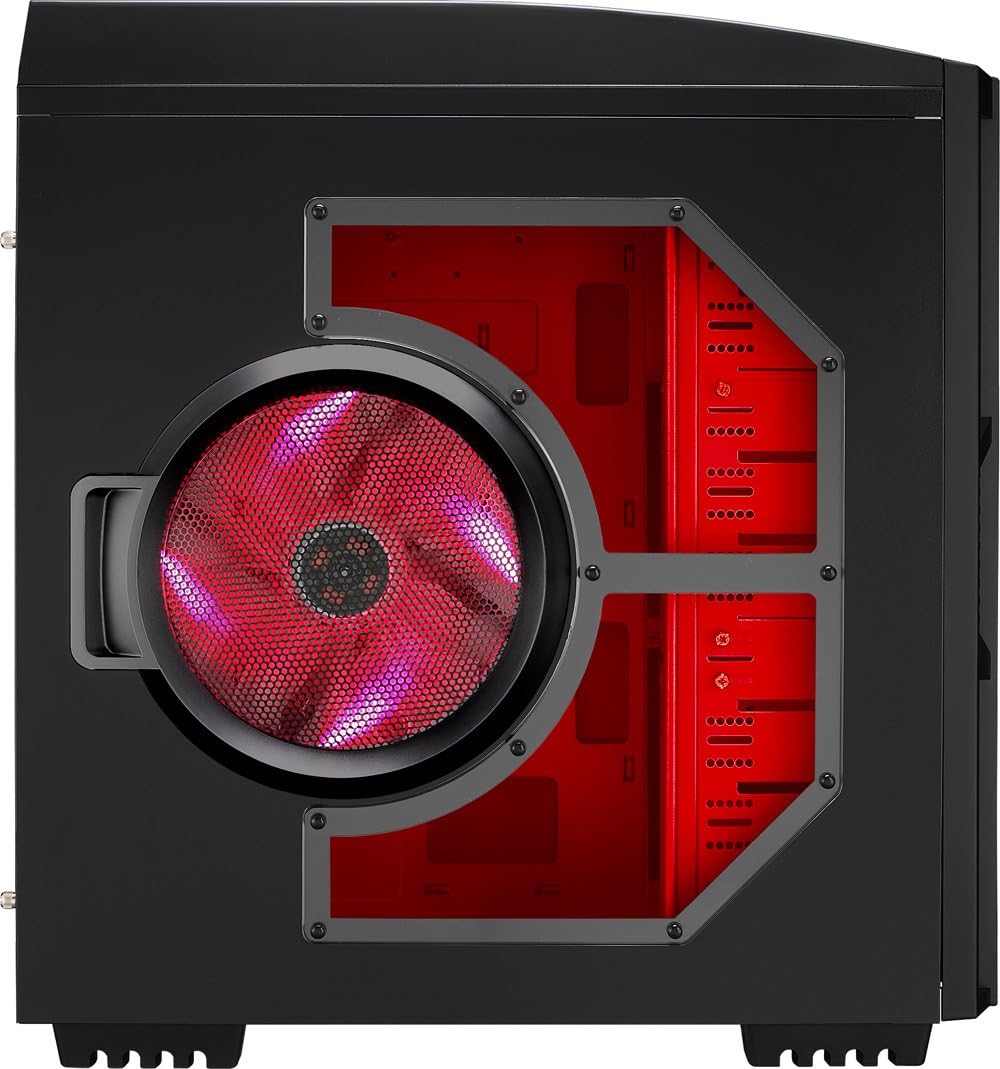
그림 4.5: 후면 view of the AZZA Solano 1000R case, displaying the red interior, rear exhaust fan, and expansion slots.
4.2 내부 Views

그림 4.6: 내부 view of the AZZA Solano 1000R case with the left side panel removed, revealing the red painted motherboard tray, drive bays, and cable routing cutouts.

Figure 4.7: Angled interior view of the AZZA Solano 1000R case, focusing on the multiple 5.25" and 3.5" drive bays.

Figure 4.8: Angled interior view of the AZZA Solano 1000R case, showing the rear 120mm exhaust fan, expansion slots, and the extensive drive bay structure.

그림 4.9: 내부 view of the AZZA Solano 1000R case with the right side panel removed, showing the space behind the motherboard tray for cable management.
5. 설치 가이드
설치를 시작하기 전에 작업 공간이 깨끗하고 정전기가 없는지 확인하십시오. 정전기 방지 손목 스트랩을 착용하는 것이 좋습니다.
5.1 사건 준비
- 케이스를 평평하고 안정적인 표면에 놓으십시오.
- 케이스 뒷면에 있는 엄지 나사를 풀고 측면 패널을 뒤쪽으로 밀어서 분리하세요.
5.2 마더 보드 설치
- 메인보드와 함께 제공된 I/O 쉴드를 케이스 후면의 개구부에 설치하십시오.
- 미리 설치된 스탠드오프에 맞춰 마더보드를 정렬하십시오. 필요한 경우 마더보드의 폼 팩터에 따라 추가 스탠드오프를 설치하십시오.
- Carefully place the motherboard onto the standoffs, ensuring the I/O ports align with the shield.
- 액세서리 상자에서 적절한 나사를 사용하여 마더보드를 고정합니다.
5.3 전원 공급 장치 설치
- Position the power supply unit (PSU) in the bottom-rear compartment of the case. You can orient it with the fan facing up or down, depending on your cooling preference and PSU design.
- 파워서플라이에 포함된 나사를 사용하여 파워서플라이를 케이스에 고정하십시오.
5.4 저장 장치 설치 (HDD/SSD)
- For 3.5" HDDs, slide the drive into an available drive bay until it clicks into place. Use the provided thumb screws for additional security if desired.
- For 2.5" SSDs, an adapter bracket (not included) may be required to fit into the 3.5" bays. Secure the SSD to the adapter, then install the adapter into a 3.5" bay.
- Connect the SATA data and power cables to your installed drives.
5.5 Optical Drive Installation
- Remove the desired 5.25" front bay cover from the case.
- Slide the optical drive into the bay from the front until it aligns with the screw holes.
- Secure the optical drive using the provided thumb screws.
- Connect the SATA data and power cables to the optical drive.
5.6 확장 카드 설치
- 케이스 후면에 있는 필요한 확장 슬롯 덮개를 제거하십시오.
- Insert your graphics card or other expansion card into the appropriate PCIe/PCI slot on your motherboard.
- Secure the card with the provided screw or tool-less latch mechanism.
5.7 케이블 관리
Utilize the cutouts and space behind the motherboard tray to route and organize your cables. This improves airflow and gives your build a cleaner appearance. Use cable ties from the accessory box to bundle cables.
5.8 전면 패널 I/O 연결
Connect the front panel cables (USB, Audio, Power Switch, Reset Switch, Power LED, HDD LED) to the corresponding headers on your motherboard. Refer to your motherboard manual for exact header locations.
6. 운영
6.1 전원 켜기/끄기
Press the power button located on the top panel to turn your system on or off. A power LED will illuminate when the system is active.
6.2 팬 제어
The case features a fan speed control switch (L/M/H) at the rear, primarily for the top, side, and rear fans. Adjust this switch to balance cooling performance and noise levels according to your preference.
7. 유지관리
7.1 청소
정기적인 청소는 최적의 공기 흐름을 유지하고 부품 수명을 연장하는 데 도움이 됩니다.
- 외부: 부드러운 d로 외부 표면을 닦으십시오.amp 옷감. 연마성 세제를 피하십시오.
- 먼지 필터: The case includes mesh filters at the bottom. Periodically remove and clean these filters to prevent dust buildup.
- 내부: Use compressed air to remove dust from inside the case, especially from fans and heatsinks. Ensure the system is powered off and unplugged before cleaning the interior.
8. 문제 해결
- 시스템 전원이 켜지지 않음: Ensure all power cables (24-pin ATX, 8-pin CPU, GPU power) are securely connected. Verify the PSU switch is in the 'ON' position. Check front panel power switch connection to the motherboard.
- 팬이 회전하지 않음: Check fan power connections to the motherboard or fan controller. Ensure the fan speed switch is not set to 'Off' or 'Low' if fans are not spinning at all.
- Side Panel Not Closing: If a large CPU cooler or tall components prevent the side panel from closing, especially due to the side fan, consider relocating the side fan to the exterior of the panel if possible, or ensure your cooler fits within the case's clearance specifications.
- Cable Management Difficulty: If the rear panel bulges due to thick cables, try rerouting cables more efficiently or using flatter cables where possible.
9. 사양
| 특징 | 세부 사항 |
|---|---|
| 모델 번호 | CSAZ-1000R |
| 케이스 유형 | 풀 타워 |
| 색상 | 검정/빨강 |
| 제품 크기(L x W x H) | 19.7 x 8.1 x 21.5인치(500 x 206 x 546mm) |
| 품목 무게 | 24파운드(10.89kg) |
| 냉각 방식 | 공기 |
| 전원 공급 장치 장착 유형 | 바텀 마운트 |
| 총 USB 포트 | 2 (USB 2.0) + 1 (eSATA) |
| 하드 디스크 폼 팩터 지원 | 3.5 인치 |
| 포함된 팬 | 2x 230mm (Top, Side), 2x 140mm (Front), 1x 120mm (Rear) |
10. 보증 및 지원
보증 정보 및 기술 지원에 대해서는 AZZA 공식 웹사이트를 참조하십시오. web사이트를 방문하거나 가까운 판매점에 문의하세요. 보증 청구를 위해 구매 증빙 자료를 보관하세요.