
1. 서론
This manual provides comprehensive instructions for the setup, operation, and maintenance of your KitVision 7-inch Digital Photo Frame, model DPF7BKK. Please read this manual thoroughly before using the device to ensure proper functionality and longevity.

그림 1: 전면 view of the KitVision 7-inch Digital Photo Frame. The frame is silver with a black bezel, displaying a vibrant image of a person holding a child on a beach.
2. 패키지 내용
아래 나열된 모든 품목이 패키지에 들어 있는지 확인하세요.
- KitVision 7-inch Digital Photo Frame (DPF7BKK)
- AC 전원 어댑터
- 분리형 스탠드
- 사용 설명서 (본 문서)

Figure 2: The product packaging for the KitVision 7-inch Digital Photo Frame. The box features a blue background with wave patterns and an image of the digital photo frame displaying a beach scene.
3. 제품 오버view
3.1. 후면 패널 및 컨트롤

그림 3: 후면 view of the digital photo frame. Visible features include the USB port, SD/MMC/MS card slot, DC power input, control buttons (ENTER, arrows, MENU, STANDBY), and a detachable stand.
- USB 포트: USB 플래시 드라이브 연결용입니다.
- SD/MMC/MS Card Slot: For inserting compatible memory cards.
- DC 입력 : Power connection port for the AC adapter.
- 제어 버튼:
- 시작하다: 선택 사항을 확인합니다.
- < / > (Left/Right Arrows): Navigates through menus and images.
- ^ / v (Up/Down Arrows): 메뉴와 옵션을 탐색합니다.
- 메뉴: 주 메뉴에 액세스합니다.
- 대기 : Powers the frame on or off.
- 분리형 스탠드: Allows for tabletop placement in landscape or portrait orientation.
- 벽걸이 구멍: 액자를 벽에 걸기 위한 용도입니다.
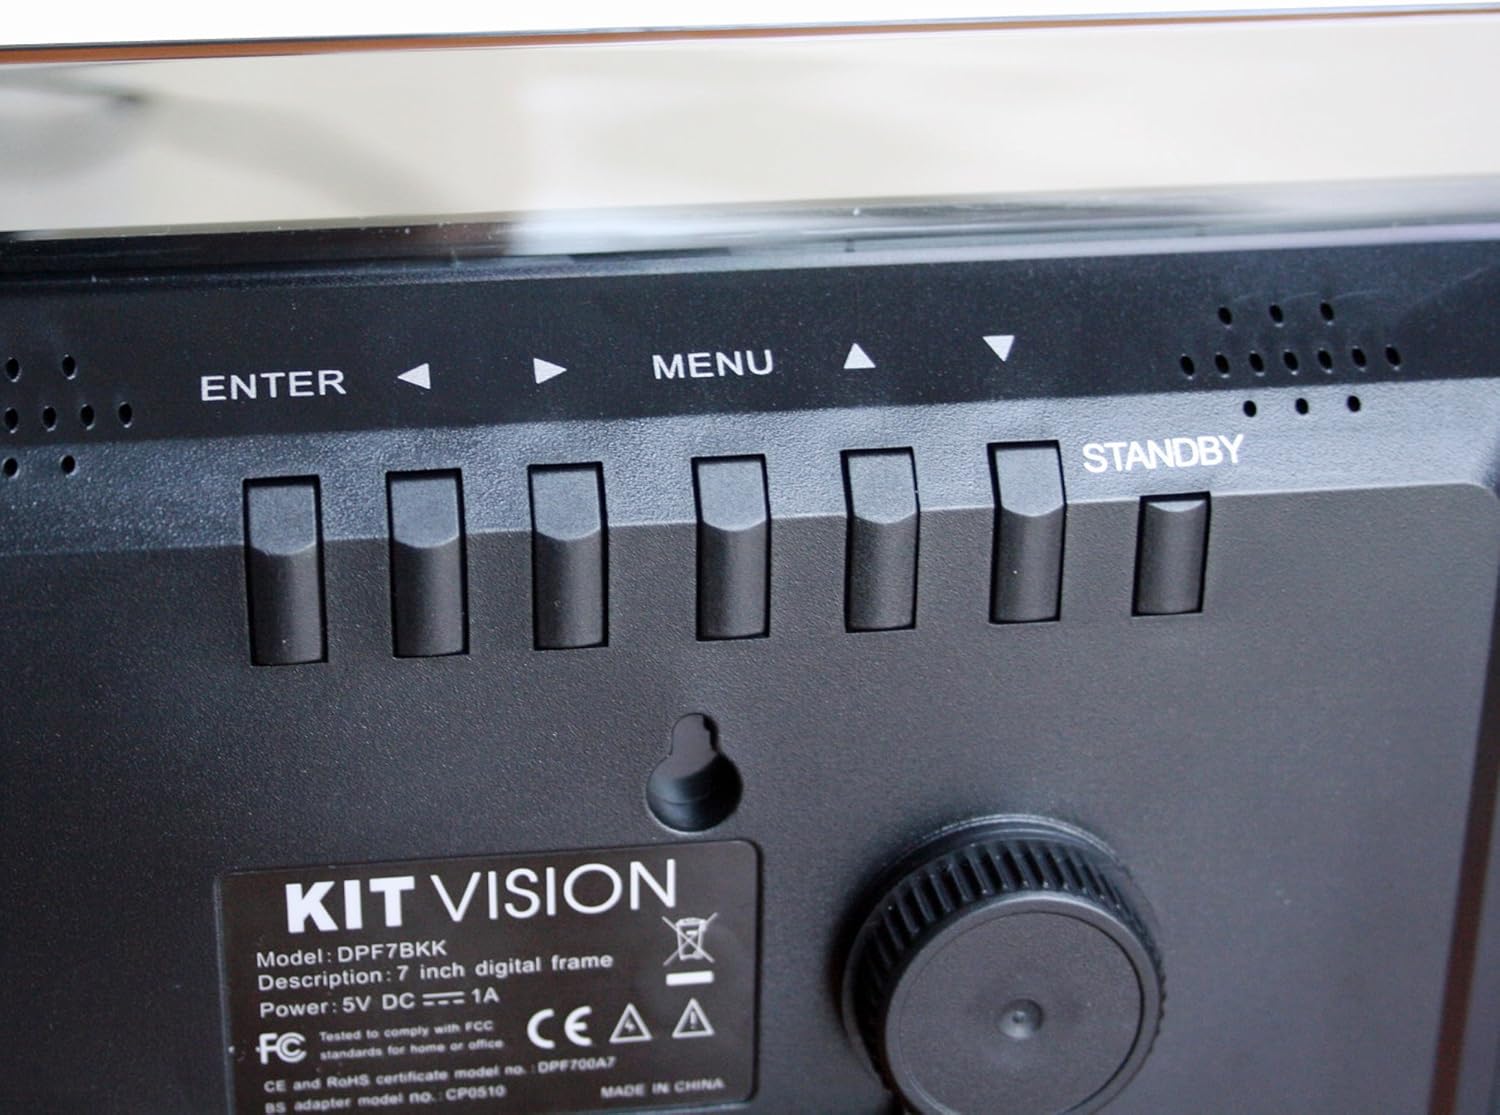
그림 4: 클로즈업 view of the control buttons and product label on the rear of the digital photo frame. The label clearly shows "KITVISION", "Model: DPF7BKK", and power specifications.
4. 설정
4.1. 스탠드 부착
- 패키지 안에 분리 가능한 스탠드를 찾아보세요.
- Insert the stand's peg into the designated hole on the rear of the photo frame.
- Rotate the stand to secure it in place and adjust the angle for optimal viewing. The stand supports both landscape and portrait orientations.
4.2. 전원 연결
- Connect the AC power adapter to the DC input port on the rear of the frame.
- 전원 어댑터의 다른 쪽 끝을 표준 전기 콘센트에 꽂습니다.
- The frame will typically power on automatically or can be turned on using the STANDBY button.
4.3. Inserting a Memory Card or USB Drive
The frame supports SD, MMC, MS memory cards, and USB flash drives. Ensure your photos are in a compatible format (e.g., JPEG).
- Carefully insert your memory card into the SD/MMC/MS slot or your USB flash drive into the USB port.
- Ensure the card or drive is inserted correctly and fully seated. Do not force it.
- The frame should automatically detect the storage device and begin displaying photos, or prompt you to select a source.
5. 사용 설명서
5.1. 기본 탐색
- 사용하세요 </> (Left/Right) and ^ / v (Up/Down) arrow buttons to navigate through menus and select options.
- 를 누르세요 입력하다 button to confirm a selection or open a sub-menu.
- 를 누르세요 메뉴 button to return to the previous menu or access the main menu from a slideshow.
- 를 누르고 계세요 대기 button to power the frame off or on.
5.2. View사진
Once a memory card or USB drive is inserted, the frame will typically start a slideshow automatically. If not, navigate to the "Photo" or "Slideshow" option in the main menu and press 입력하다.
5.3. 슬라이드쇼 설정
To customize your slideshow:
- 를 누르세요 메뉴 버튼을 눌러 메인 메뉴에 액세스합니다.
- Navigate to "Settings" or "Slideshow Options" using the arrow buttons and press 입력하다.
- 다음과 같은 설정을 조정하세요:
- 표시 시간: Duration each photo is shown.
- 전환 효과: How photos change (e.g., fade, wipe).
- 반복 모드: Loop all photos or play once.
- 사진 순서: Sequential or random.
- 누르다 입력하다 변경 사항을 확인하기 위해 메뉴 종료합니다.
6. 유지관리
6.1. 프레임 청소
- 청소하기 전에 항상 전원 어댑터를 분리하십시오.
- 부드럽고 마른 보푸라기 없는 천을 사용하여 화면과 프레임을 가볍게 닦으세요.
- 화면에 잔뜩 묻은 자국은 가볍게 닦아내세요amp천에 물이나 화면에 안전한 세척액을 묻혀 닦으세요. 화면에 직접 액체를 뿌리지 마세요.
- 연마성 세척제, 용제 또는 알코올 기반 용액은 표면을 손상시킬 수 있으므로 사용을 피하십시오.
6.2. 보관
- When not in use for extended periods, store the digital photo frame in a cool, dry place, away from direct sunlight and extreme temperatures.
- It is recommended to store the frame in its original packaging to protect it from dust and physical damage.
7. 문제 해결
| 문제 | 가능한 원인 | 해결책 |
|---|---|---|
| 프레임의 전원이 켜지지 않습니다. | No power, faulty adapter, or STANDBY button not pressed. | Ensure power adapter is securely connected to both the frame and a working electrical outlet. Press the STANDBY button. Try a different outlet. |
| 이미지가 표시되지 않습니다. | No memory card/USB, incompatible file format, or card/USB not inserted correctly. | Insert a memory card or USB drive with compatible image files (JPEG). Ensure it is fully seated. Check if the frame is set to the correct source input in the menu. |
| 이미지가 왜곡되거나 화질이 낮아 보입니다. | Low resolution images, damaged memory card/USB, or screen issue. | Use higher resolution images. Try a different memory card or USB drive. Clean the screen. |
| 버튼이 반응하지 않습니다. | 일시적인 소프트웨어 오류입니다. | Disconnect the power adapter, wait 10 seconds, then reconnect it to reset the device. |
8. 사양
| 모델 번호 | DPF7BKK |
| 화면 크기 | 7 인치 |
| 해결 | WXGA |
| 제품 치수 | 9.06 x 6.5 x 1.26 인치 |
| 품목 무게 | 0.012 온스 |
| 연결 기술 | USB |
| 전원 | Corded Electric (5V DC === 1A) |
| 지원되는 메모리 카드 | SD, MMC, MS |
| 지원되는 이미지 형식 | JPEG (common format, specific list not provided in input) |
9. 보증 및 지원
For warranty information and technical support, please refer to the documentation provided at the time of purchase or contact KitVision customer service. Specific warranty terms may vary by region and retailer.