
1. 소개 및 이상view
The AKG P220 is a large-diaphragm true condenser microphone designed for professional studio and stage applications. It delivers a warm and clear sound, suitable for recording lead vocals, acoustic guitars, and brass instruments. Its robust construction and versatile features make it a reliable choice for various audio recording needs.
Key features include a switchable bass-cut filter to eliminate unwanted low-frequency rumble and an attenuation pad for handling high sound pressure levels (up to 155dB SPL), making it ideal for loud sound sources.
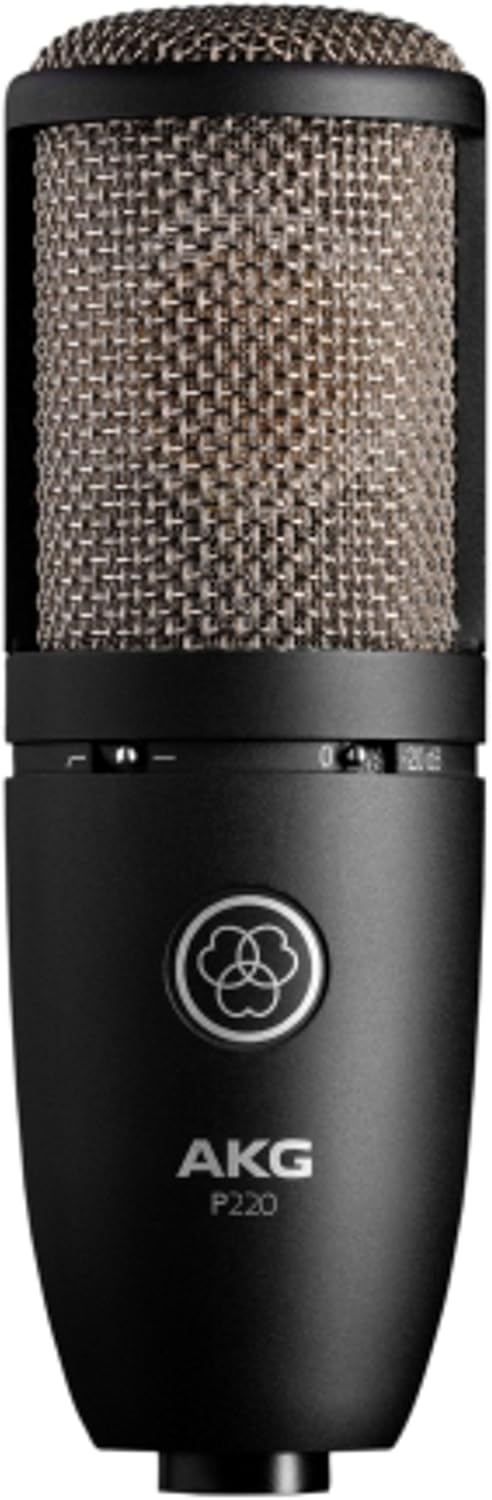
Image: The AKG P220 microphone, showcasing its black metal body and silver grille.
2. 설정 지침
2.1 풀기 및 검사
Carefully remove the microphone and its accessories from the aluminum carrying case. Inspect all components for any signs of damage. The package should include the AKG P220 microphone, a spider-type shock mount, and a spare elastic band for the mount.
2.2 쇼크 마운트 부착
- Gently insert the microphone into the shock mount. Ensure it is securely seated within the elastic bands to isolate it from vibrations.
- Tighten the screw mechanism on the shock mount to firmly hold the microphone in place.
- Attach the shock mount to a standard microphone stand using the threaded adapter.

Image: The AKG P220 microphone securely mounted in its spider-type shock mount.
2.3 Connecting to Audio Interface/Mixer
The AKG P220 requires an XLR cable and 48V phantom power for operation. It is not a plug-and-play USB microphone.
- Connect one end of a balanced XLR cable to the XLR output connector at the bottom of the microphone.
- Connect the other end of the XLR cable to an input on your audio interface or mixing console.
- Activate the 48V phantom power on your audio interface or mixing console for the connected input channel. The microphone will not function without phantom power.
3. 마이크 작동
3.1 Controls on the Microphone
The AKG P220 features two switches on its body:
- 저음 차단 필터: This switch activates a low-cut filter at 300 Hz. Use it to reduce unwanted low-frequency noise such as rumble, footfall, or air conditioning hum, especially when recording vocals or acoustic instruments.
- Attenuation Pad (-20 dB): This switch engages a -20 dB pre-attenuation pad. Activate this when recording extremely loud sound sources (e.g., drum overheads, loud guitar amplifiers, brass instruments) to prevent input overload and distortion in your audio interface or mixer.
3.2 Microphone Placement and Techniques
Optimal microphone placement is crucial for achieving the best sound quality. Experiment with distances and angles relative to the sound source. The P220 has a cardioid polar pattern, meaning it is most sensitive to sounds coming from the front and rejects sounds from the sides and rear. This helps in isolating the desired sound source and reducing room reflections.
For vocals, position the microphone 6-12 inches from the singer, slightly off-axis to minimize plosives. For acoustic guitars, try pointing it towards the 12th fret for a balanced sound. When miking loud instruments, utilize the attenuation pad and maintain a suitable distance to capture the full dynamic range without distortion.
4. 유지관리 및 관리
- 청소: Use a soft, dry cloth to clean the microphone body. Avoid using liquid cleaners or solvents, as they can damage the finish or internal components.
- 저장: Always store the AKG P220 in its provided aluminum carrying case when not in use. The custom-fit foam interior protects the microphone and shock mount from dust, moisture, and physical damage.
- 손질: Condenser microphones are delicate instruments. Avoid dropping or subjecting the microphone to harsh impacts.
- 고무줄: The shock mount's elastic bands may wear out over time. Replace them with the provided spare band or genuine AKG replacement parts to maintain effective vibration isolation.
5. 문제 해결
| 문제 | 가능한 원인 | 해결책 |
|---|---|---|
| 마이크에서 소리가 나지 않음 | No phantom power (48V) activated. Incorrect XLR cable connection. Faulty cable. | Ensure 48V phantom power is enabled on your audio interface/mixer. Check XLR cable connections at both ends. Try a different XLR cable. |
| 왜곡된 소리 | Input overload (signal too hot). Attenuation pad not engaged for loud sources. | Engage the -20 dB attenuation pad for loud sources. Reduce the gain on your audio interface/mixer input. Increase distance from the sound source. |
| Excessive low-frequency noise/rumble | Unwanted low-frequency sounds (e.g., stage rumble, air conditioning). Bass-cut filter not engaged. | Engage the bass-cut filter switch. Ensure the microphone is properly isolated with the shock mount. |
| 진동을 포착하는 마이크 | Shock mount not properly installed or elastic bands are worn. | Ensure the microphone is correctly seated in the shock mount. Replace worn elastic bands. |
6. 기술 사양
| 특징 | 사양 |
|---|---|
| 상표 | 악키지 |
| 모델명 | AKG Pro Audio Perception 220 |
| 마이크 폼 팩터 | 대형 다이어프램 |
| 극성 패턴 | 단방향 (카디오이드) |
| 연결 기술 | XLR |
| 전원 | Phantom power (XLR) |
| 주파수 응답 | 20Hz - 20kHz |
| 오디오 감도 | 155 Decibels (SPL) |
| 임피던스 | 200옴 |
| 신호 대 잡음 비율 | 78데시벨 |
| 품목 무게 | 1.16 파운드 |
| 제품 크기(L x W x H) | 9 x 5.5 x 9.8 인치 |
| 재료 | 금속 |
| 색상 | Silver Blue |
| 제조업체 | 하만 뮤직 그룹 |
7. 상자 안에 무엇이 들어있나요?
- AKG P220 Condenser Microphone
- 스파이더형 쇼크 마운트
- 알루미늄 휴대용 케이스
- Spare Elastic Band for Shock Mount
8. 보증 및 지원
For warranty information, technical support, or service inquiries, please refer to the official AKG web웹사이트를 방문하시거나 공인 AKG 대리점에 문의하십시오. 보증 청구를 위해 구매 증빙 자료를 보관하십시오.
방문하세요 AKG 스토어 추가 제품 정보 및 액세서리를 확인하세요.