
1. 서론
This manual provides essential information for the safe and efficient operation of your Technaxx Wireless CarPlay & Android Car Monitor TX-361. Please read this manual thoroughly before using the device and retain it for future reference. The TX-361 is designed to integrate modern smartphone connectivity, including Apple CarPlay and Android Auto, into your vehicle without requiring a complex car radio replacement. It also features an integrated DAB digital radio for enhanced audio experience.
2. 안전 정보
- 기기를 사용할 때는 항상 책임감 있게 행동하고 현지 교통 법규를 준수하십시오. 부주의 운전은 사고로 이어질 수 있습니다.
- 기기를 분해하거나 개조하지 마십시오. 보증이 무효화되고 안전 위험이 발생할 수 있습니다.
- 기기를 극한의 온도, 직사광선, 습기에 노출되지 않도록 하세요.
- 장치가 안전하게 장착되었고 방해가 되지 않는지 확인하십시오. view 또는 차량 제어를 방해합니다.
- 제공된 전원 케이블과 액세서리만 사용하십시오.
- If the device malfunctions, disconnect it from the power source and contact customer support.
3. 패키지 내용
아래 나열된 모든 품목이 패키지에 포함되어 있는지 확인하세요.
- DAB 7-inch CarPlay with Touch Screen TX-361
- Power Supply (USB-A to USB-C, 1.5m cable)
- AUX 케이블 (1m)
- DAB 안테나
- Holder (Mounting Bracket)
- 사용자 설명서
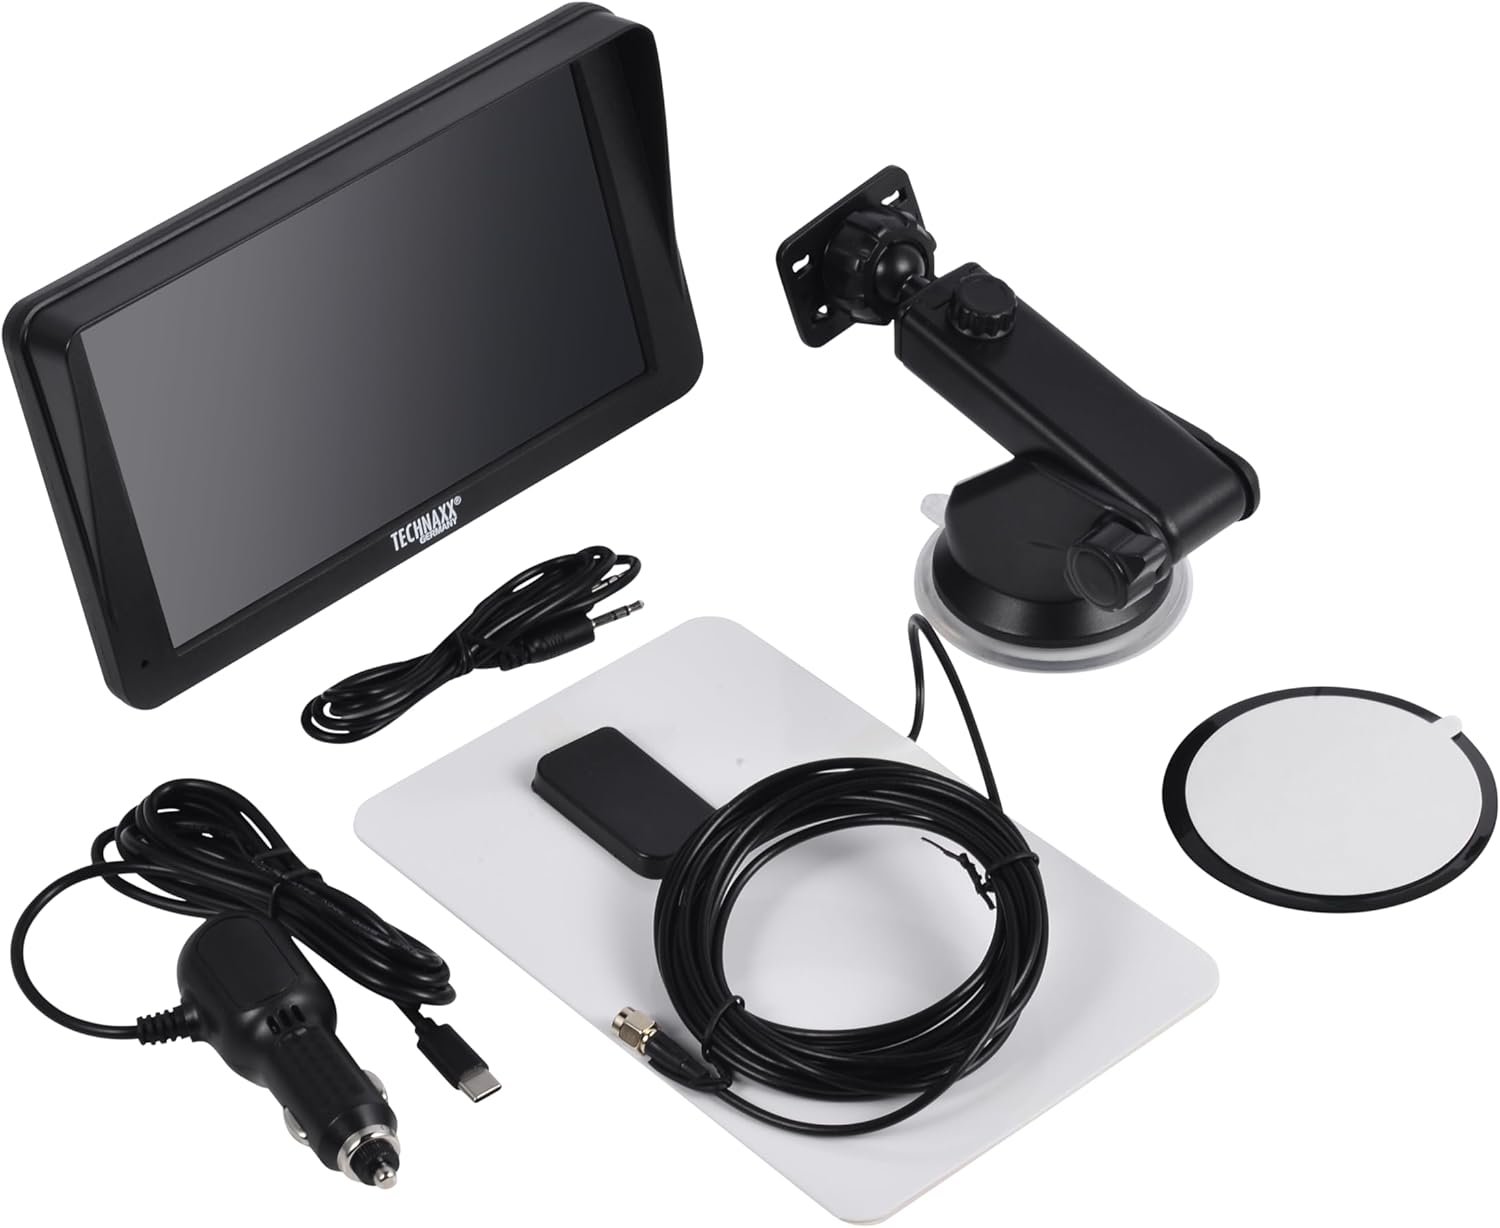
Image: All components included in the Technaxx TX-361 package, neatly laid out.
4. 제품 오버view
Familiarize yourself with the main components of your TX-361 monitor.
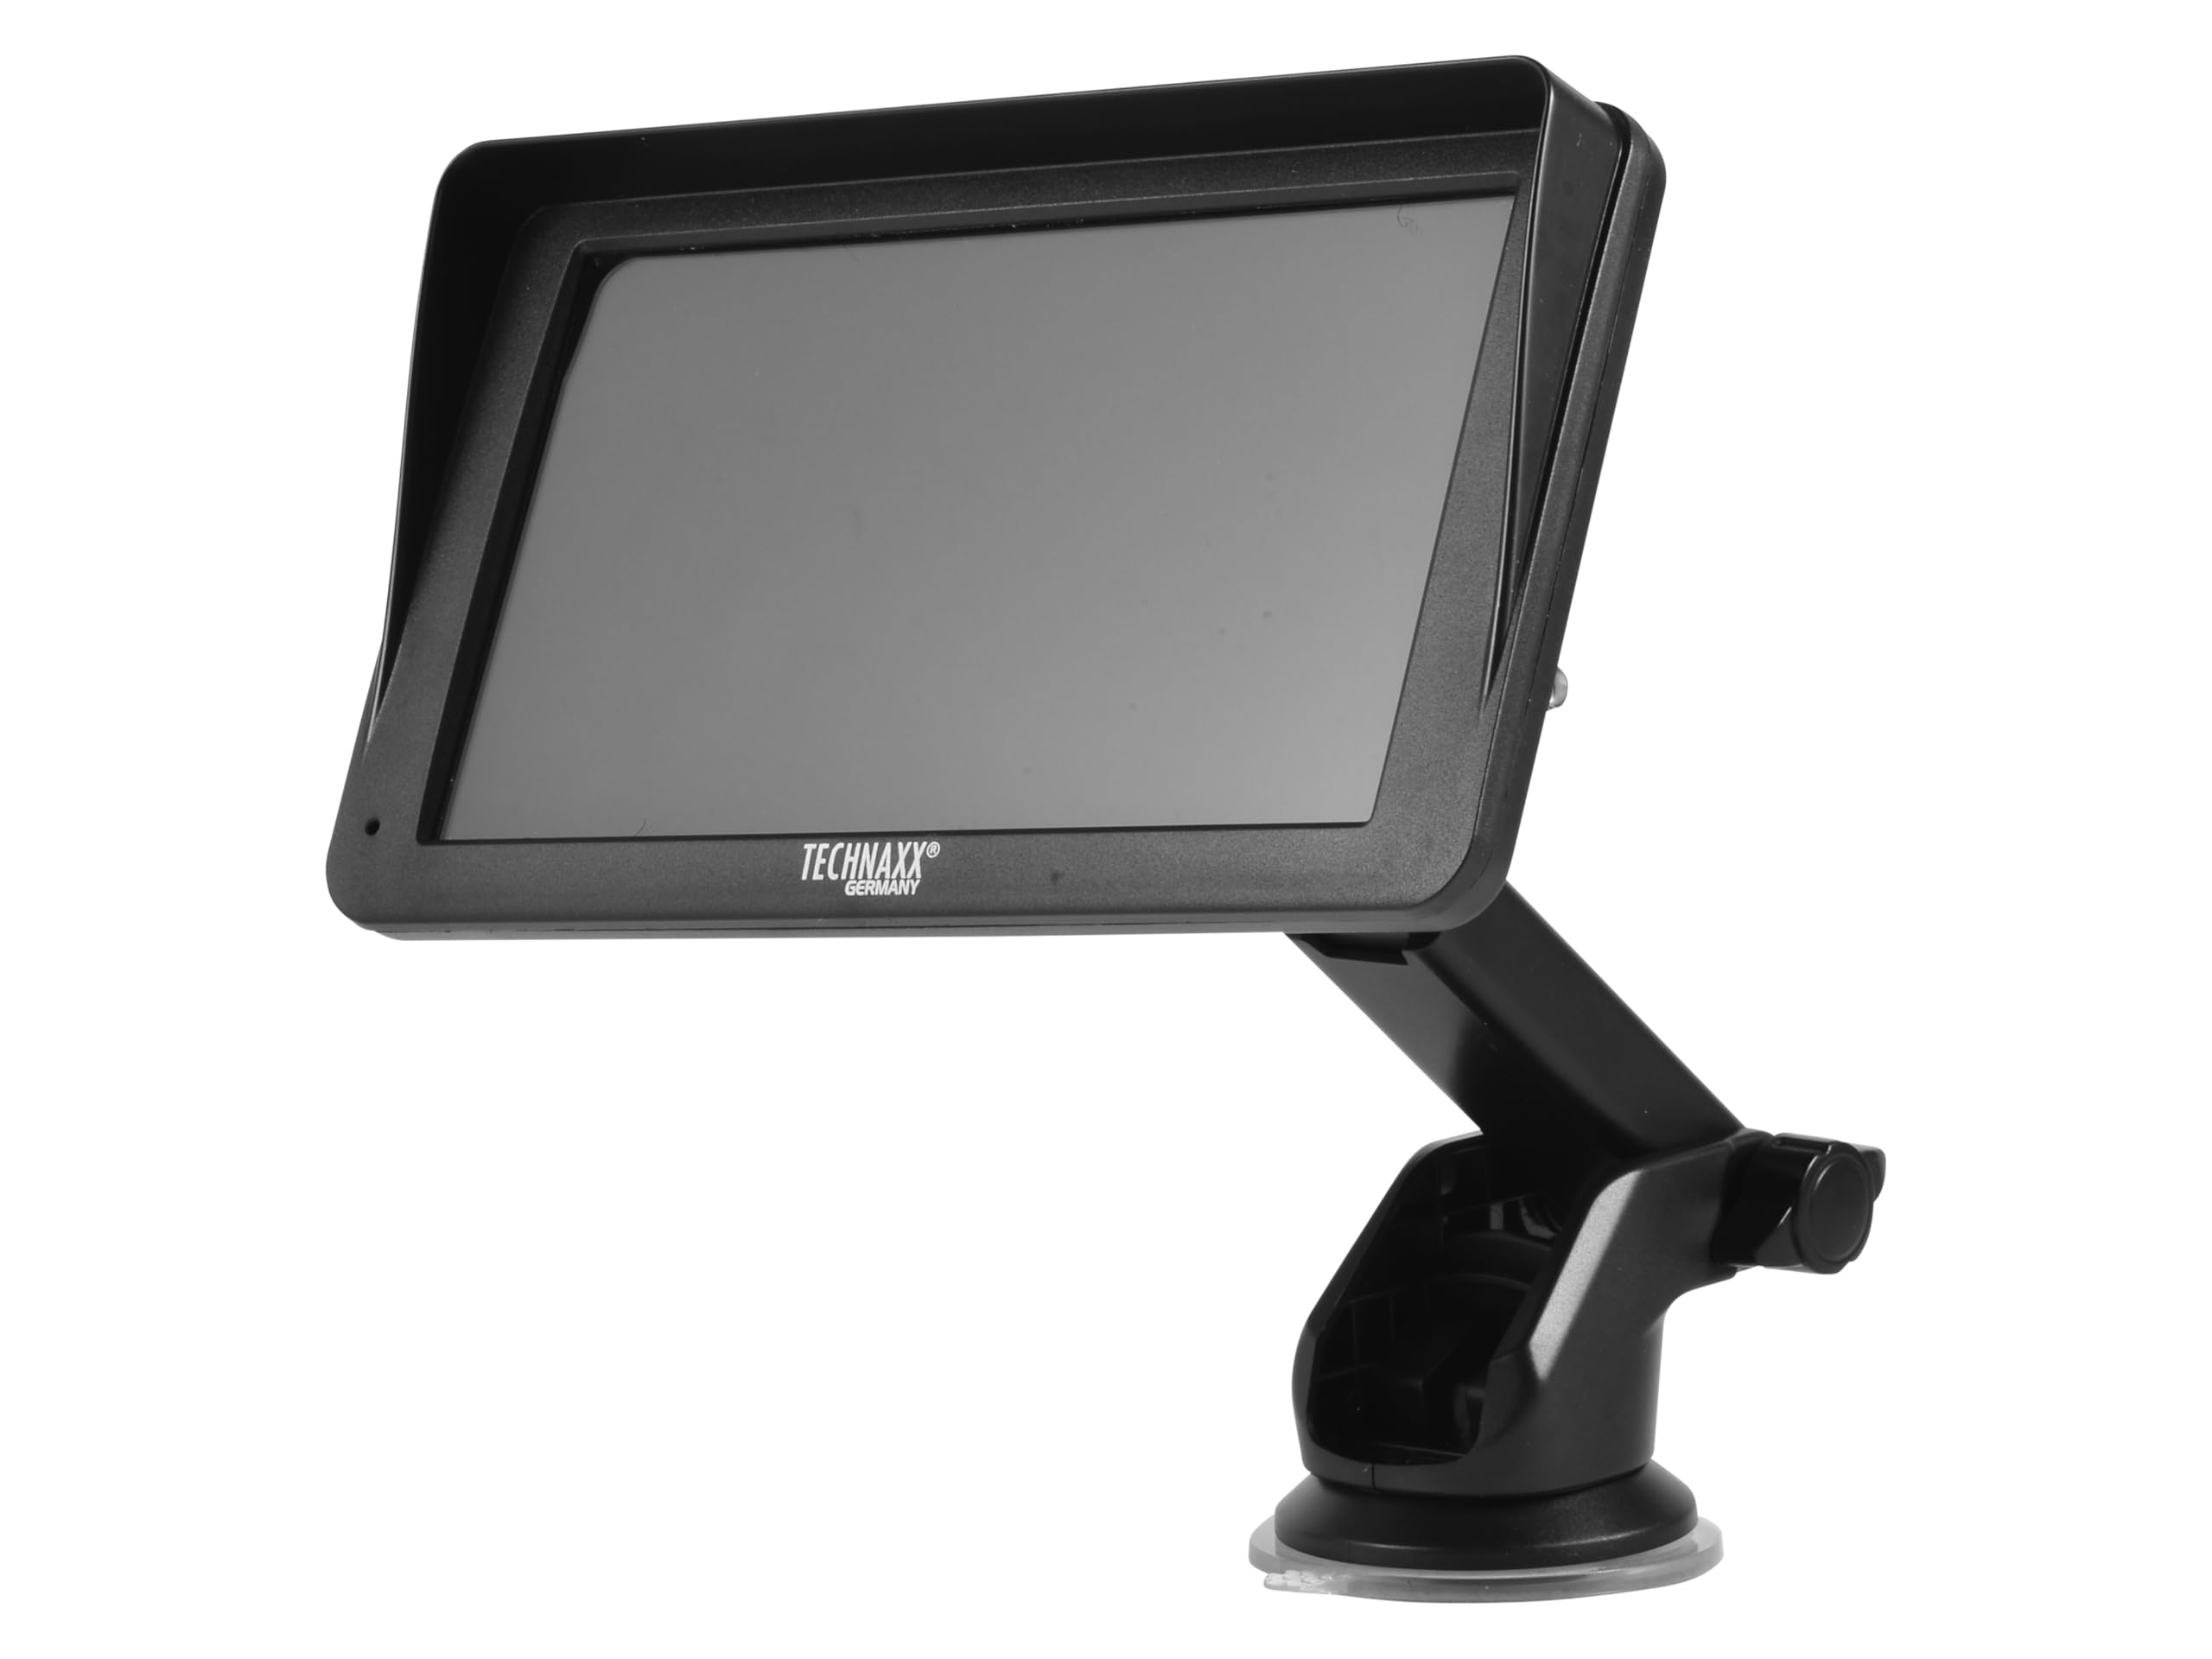
이미지: 앞면 view of the TX-361 monitor with its 7-inch display and 'TECHN AXX GERMANY' branding, attached to the adjustable mounting stand.

이미지: 후면 view of the TX-361 monitor, highlighting the ventilation grilles and the attachment point for the mounting bracket.

이미지: 상세 view of the right side of the TX-361 monitor, showing the power button, reset button, USB-C power input, AUX output, and USB-A port.
4.1. 장치 구성 요소
- 7인치 정전식 터치스크린: 모든 기능을 표시하는 메인 디스플레이입니다.
- 전원 버튼: 오른쪽 상단에 위치해 있습니다.
- 재설정 버튼: 시스템 초기화를 위한 작은 핀홀 버튼.
- USB-C 포트: 전원 입력용.
- 보조 출력: 3.5mm jack for wired audio transmission.
- USB-A 포트: 미디어 재생 또는 외부 기기 충전용입니다.
- DAB Antenna Input: Connector for the external DAB antenna.
- 통합 스피커: 오디오를 직접 재생하려면.
5. 설정
5.1. 장치 장착
The TX-361 can be mounted on your vehicle's windscreen or dashboard using the provided holder.
- 모니터를 마운팅 브래킷에 부착하세요.
- For Windscreen Mounting: Clean the desired area on the windscreen. Press the suction cup firmly against the glass and engage the lever to secure it.
- 대시보드 장착용: Clean the desired area on the dashboard. If necessary, use the adhesive disc provided for a more secure attachment point for the suction cup. Press the suction cup firmly and engage the lever.
- 최적의 상태로 모니터 각도를 조정하세요. view운전을 방해하지 않고 view.

Image: The TX-361 monitor securely mounted on a car dashboard, showing its position relative to the driver's view.

Image: The TX-361 monitor mounted on a car windscreen, demonstrating an alternative placement option.
5.2. 전원 연결
- Connect the USB-C end of the power cable to the USB-C port on the monitor.
- Plug the USB-A end of the power cable into the provided 12V/24V cigarette lighter adapter.
- Insert the cigarette lighter adapter into your vehicle's 12V/24V power socket. The device will power on automatically or can be turned on using the power button.
5.3. DAB Antenna Connection
For optimal DAB radio reception, connect the included DAB antenna:
- Connect the DAB antenna cable to the dedicated DAB antenna input on the monitor.
- Mount the DAB antenna on your windscreen or another suitable location, ensuring it has clear line of sight for best signal reception.
6. 사용 설명서
6.1. 전원 켜기 / 끄기
- 전원 켜기: The device typically powers on automatically when connected to the vehicle's power. If not, press and hold the power button on the top right side.
- 전원 끄기 : Press and hold the power button until the device shuts down. A short press will turn the screen off/on.
6.2. Initial Setup and Smartphone Connection
The TX-361 supports wireless Apple CarPlay and Android Auto via Wi-Fi and Bluetooth 5.0.
- 스마트폰의 Wi-Fi와 Bluetooth가 활성화되어 있는지 확인하세요.
- On the TX-361 monitor, navigate to the CarPlay or Android Auto section.
- The monitor will display a Bluetooth name. On your smartphone, search for and connect to this Bluetooth device.
- Once connected via Bluetooth, the device will prompt you to enable Wi-Fi for CarPlay/Android Auto functionality. Confirm the connection on your phone.
- After successful pairing, Apple CarPlay or Android Auto will launch automatically on the monitor.
6.3. 터치스크린 조작
The 7-inch capacitive touchscreen allows for intuitive control:
- 수도꼭지: 항목을 선택하거나 작업을 확인합니다.
- 강타: Navigate through menus or lists.
- 핀치 투 줌: (Where supported, e.g., in navigation apps) Adjust map zoom levels.
6.4. DAB Digital Radio
To use the integrated DAB digital radio:
- Ensure the DAB antenna is properly connected.
- From the main menu, select the 'DAB Radio' option.
- The device will automatically scan for available DAB stations.
- Select your desired station from the list.
6.5. FM 라디오
For traditional FM radio reception:
- From the main menu, select the 'FM Radio' option.
- 화면상의 컨트롤을 사용하여 방송국을 검색하거나 수동으로 주파수를 맞추세요.
6.6. 오디오 출력 옵션
The TX-361 offers several ways to transmit audio to your vehicle's sound system:
- 통합 스피커: Audio will play directly from the monitor's built-in speaker.
- 보조 케이블: Connect the provided 3.5mm AUX cable from the monitor's AUX output to your car's AUX input. Select 'AUX' as the input source on your car radio.
- FM 전송: Select an unused FM frequency on the TX-361 and tune your car radio to the same frequency. Audio will be transmitted wirelessly to your car's speakers.
7. 유지관리
- 청소: 부드럽고 마른 천을 사용하여 화면과 기기 외부를 닦으세요. 연마성 세척제나 용제를 사용하지 마세요.
- 저장: 장기간 기기를 보관할 경우 전원을 끄고 서늘하고 건조한 곳에 보관하세요.
- 소프트웨어 업데이트: 정기적으로 제조업체를 확인하십시오 web최적의 성능을 보장하기 위해 사용 가능한 펌웨어 업데이트가 있는지 사이트를 방문하세요.
8. 문제 해결
| 문제 | 가능한 해결책 |
|---|---|
| 장치의 전원이 켜지지 않습니다. |
|
| CarPlay/Android Auto에 연결할 수 없습니다. |
|
| Poor DAB/FM radio reception. |
|
| 오디오 출력이 없습니다. |
|
9. 사양
| 특징 | 사양 |
|---|---|
| 모델 번호 | 5361 |
| 표시하다 | 7인치 정전식 터치스크린 |
| 연결 기술 | Wi-Fi (Dual-band 2.4 / 5 GHz), Bluetooth 5.0 |
| 특별 기능 | Wireless CarPlay & Android Auto, DAB Digital Radio, FM Radio, Touchscreen Display |
| DAB 주파수 범위 | Band III: 174-240 MHz |
| 오디오 출력 | AUX, FM Transmission, Integrated Speaker |
| 전원 공급 장치 | 12V/24V via Cigarette Lighter |
| 제품 크기(D x W x H) | 18.8D x 10.8W x 3.5H 센티미터 |
| 품목 무게 | 0.58파운드(약 263그램) |
10. 보증 및 지원
Technaxx products are covered by a manufacturer's warranty. For detailed warranty information, please refer to the warranty card included with your product or visit the official Technaxx website. For technical support, troubleshooting assistance, or service inquiries, please contact Technaxx customer support through their official channels.
추가 리소스, FAQ 및 연락처 정보는 다음에서 자주 찾을 수 있습니다. Technaxx official web대지.