
소개
This manual provides detailed instructions for the installation, operation, and maintenance of your DB DRIVE A3 2250.5 Okur Series A3 Class AB 1000 Watt 5-Channel Amp앰프입니다. 설치 또는 작동 전에 본 설명서를 꼼꼼히 읽어 올바른 사용법을 숙지하고 제품 또는 차량 오디오 시스템의 손상을 방지하십시오.
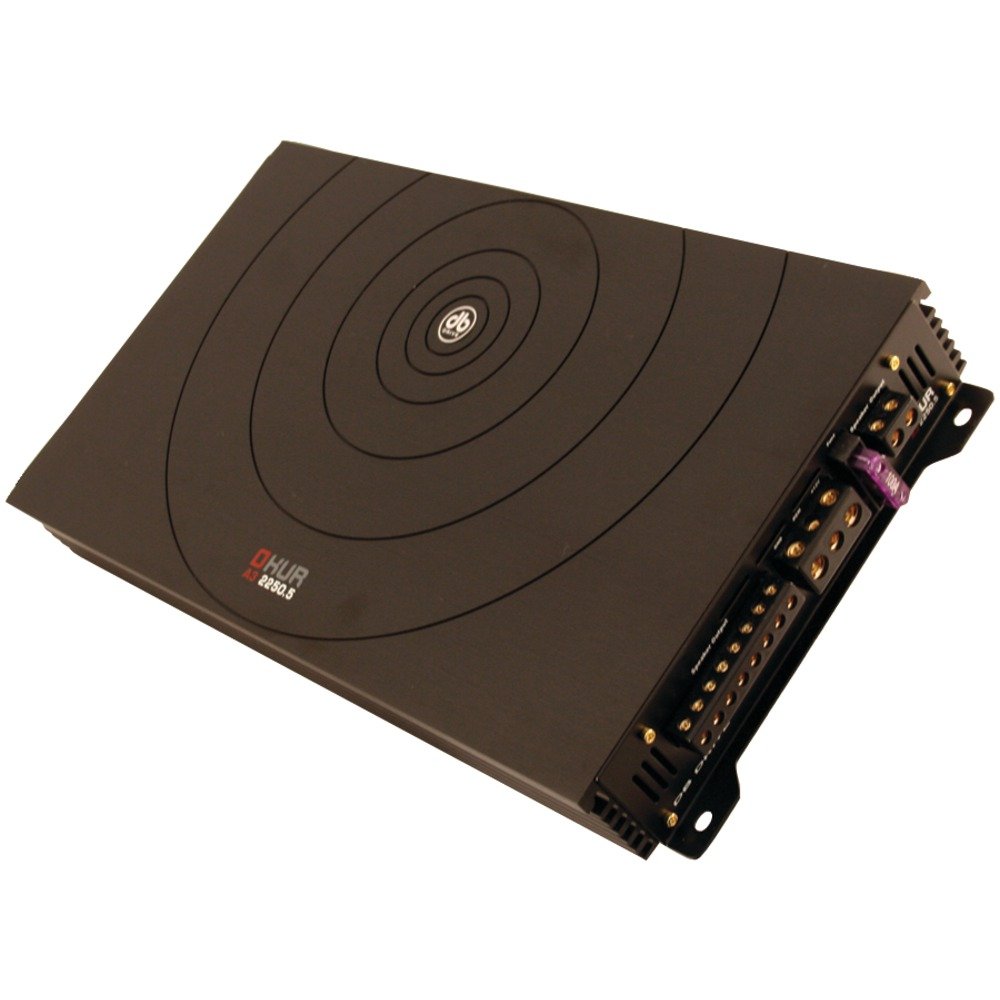
Image: DB DRIVE A3 2250.5 Okur Series A3 Class AB 1000 Watt 5-Channel Amp증폭기. 이 이미지는 다음을 보여줍니다. amp앰프의 상단 view, highlighting its compact design and branding.
안전 정보
부상이나 손상을 예방하려면 항상 다음 안전 예방 조치를 준수하세요.
- Disconnect the vehicle's battery negative terminal before making any power connections.
- Ensure all wiring is properly routed and secured to prevent pinching or short circuits.
- 설치 설명서에 명시된 대로 전원 및 접지 연결에는 적절한 굵기의 전선을 사용하십시오.
- 설치하다 amp과열을 방지하기 위해 적절한 환기가 가능한 위치에 보관하세요.
- 설치를 피하십시오 amp습기나 과도한 진동에 노출되는 장소에는 증폭기를 설치하지 마십시오.
- 설치 과정의 어떤 부분이든 확실하지 않은 경우 전문 자동차 오디오 설치자에게 문의하세요.
설정 및 설치
1. 개봉 및 검사
조심스럽게 amplifier from its packaging. Inspect the unit for any signs of damage that may have occurred during shipping. Contact your dealer immediately if any damage is found.
2. 장착 Amp리퍼
Choose a mounting location that is dry, well-ventilated, and secure. Common locations include under a seat, in the trunk, or behind a panel. Ensure there is sufficient airflow around the amp증폭기의 방열판.
- 장착 구멍을 표시하려면 다음을 사용하십시오. amp증폭기를 템플릿으로 사용합니다.
- Drill pilot holes if necessary, being careful not to damage any vehicle components.
- 보안 amp제공된 장착 나사를 사용하여 증폭기를 설치하십시오.
3. 배선 연결
Proper wiring is crucial for performance and safety. Refer to the following guidelines:
- 전원(BATT+): Connect a heavy-gauge wire (e.g., 4 AWG or 8 AWG depending on total power) directly from the positive terminal of the vehicle's battery. Install an inline fuse holder within 18 inches (45 cm) of the battery.
- 접지(GND): Connect a heavy-gauge wire of the same size as the power wire to a clean, unpainted metal surface of the vehicle's chassis. Ensure a solid, low-resistance connection.
- 원격(REM): Connect a smaller gauge wire (e.g., 18 AWG) from the amplifier's remote terminal to the remote output of your head unit. This turns the amp헤드 유닛으로 라이터를 켜고 끌 수 있습니다.
- RCA 입력: 헤드 유닛의 사전에서 RCA 케이블을 연결합니다.amp 출력 amplifier's RCA input jacks. Ensure correct channel matching (Front L/R, Rear L/R, Sub).
- 스피커 출력: Connect speaker wires from the amplifier's speaker terminals to your speakers. Observe correct polarity (+ to + and - to -). This is a 5-channel amplifier, typically 4 channels for full-range speakers and 1 channel for a subwoofer.
4. Gain, Crossover, and Bass Boost Settings
These settings allow you to fine-tune the amplifier's output to match your audio system and preferences.
- 제어권을 얻으세요: Adjust the gain to match the output voltage of your head unit. Start with the gain at minimum, then slowly increase it until you hear distortion, then back off slightly. This is not a volume control.
- Crossover (LPF/HPF):
- 저역 통과 필터 (LPF): For the subwoofer channel, set the LPF to allow only low frequencies to pass (e.g., 80-120 Hz).
- 하이패스 필터(HPF): For the full-range channels, set the HPF to block low frequencies from reaching your main speakers (e.g., 80-100 Hz) to prevent distortion and improve sound clarity.
- 베이스 부스트: Use the bass boost sparingly. Excessive bass boost can lead to distortion and speaker damage. Adjust to taste, ensuring sound remains clear.
작동 지침
설치 및 구성이 완료되면 amplifier will power on automatically with your head unit via the remote turn-on wire. Adjust volume and tone controls primarily from your head unit. The amplifier's settings (gain, crossover) are set during installation and generally do not require frequent adjustment.
유지
The DB DRIVE A3 2250.5 amp증폭기는 최소한의 유지보수만 필요합니다.
- 청소주기적으로 닦아주세요 amp앰프 외부의 먼지는 부드럽고 마른 천으로 닦아내십시오. 강한 화학 약품이나 연마성 세척제를 사용하지 마십시오.
- 점검: Occasionally check all wiring connections to ensure they are secure and free from corrosion. Ensure the amplifier's ventilation fins are not obstructed.
문제 해결
문제가 발생하는 경우 amplifier의 경우, 다음의 일반적인 문제와 해결책을 참조하세요.
| 문제 | 가능한 원인 | 해결책 |
|---|---|---|
| 전원 없음 / Amp리퍼가 켜지지 않습니다 |
|
|
| 소리가 출력되지 않음 |
|
|
| 왜곡된 소리 |
|
|
| Amplifier 과열(보호 모드) |
|
|
명세서
| 특징 | 세부 사항 |
|---|---|
| 모델 번호 | A3 2250.5 |
| 최대 전력 출력 | 1000 와트 |
| 채널 | 5-Channel (4 stereo, 1 mono for subwoofer) |
| Ampliifier 클래스 | AB 클래스 |
| 구성 요소 | Audiophile Grade |
| 치수(길이 x 너비 x 높이) | 53.59 x 30.48 x 10.92cm |
| 무게 | 6.53kg |
| 열 관리 | DRIVESINK (Okur Series A3 feature) |
보증 및 지원
DB Drive products are designed for reliability and performance. This product is covered by a limited warranty. Please refer to the warranty card included with your product or visit the official DB Drive web자세한 보증 약관은 해당 사이트에서 확인하세요.
For technical support, service, or warranty claims, please contact your authorized DB Drive dealer or visit the DB Drive official web연락처 정보와 지원 리소스를 제공하는 사이트입니다.