
1. 서론
The Orion EZ Finder II Telescope Reflex Sight is a non-magnifying sighting device designed to simplify the process of aiming your telescope. It projects a small, LED-powered red dot onto a wide viewing window, allowing you to quickly and accurately point your telescope at celestial objects. This manual will guide you through the installation, operation, and care of your EZ Finder II.

Figure 1: Orion EZ Finder II Telescope Reflex Sight mounted on a telescope.
2. 구성 요소
The Orion EZ Finder II package includes the following:
- EZ Finder II Reflex Sight unit
- Dovetail mounting bracket (pre-attached)
- CR-2032 3-volt lithium battery (pre-installed or included separately)
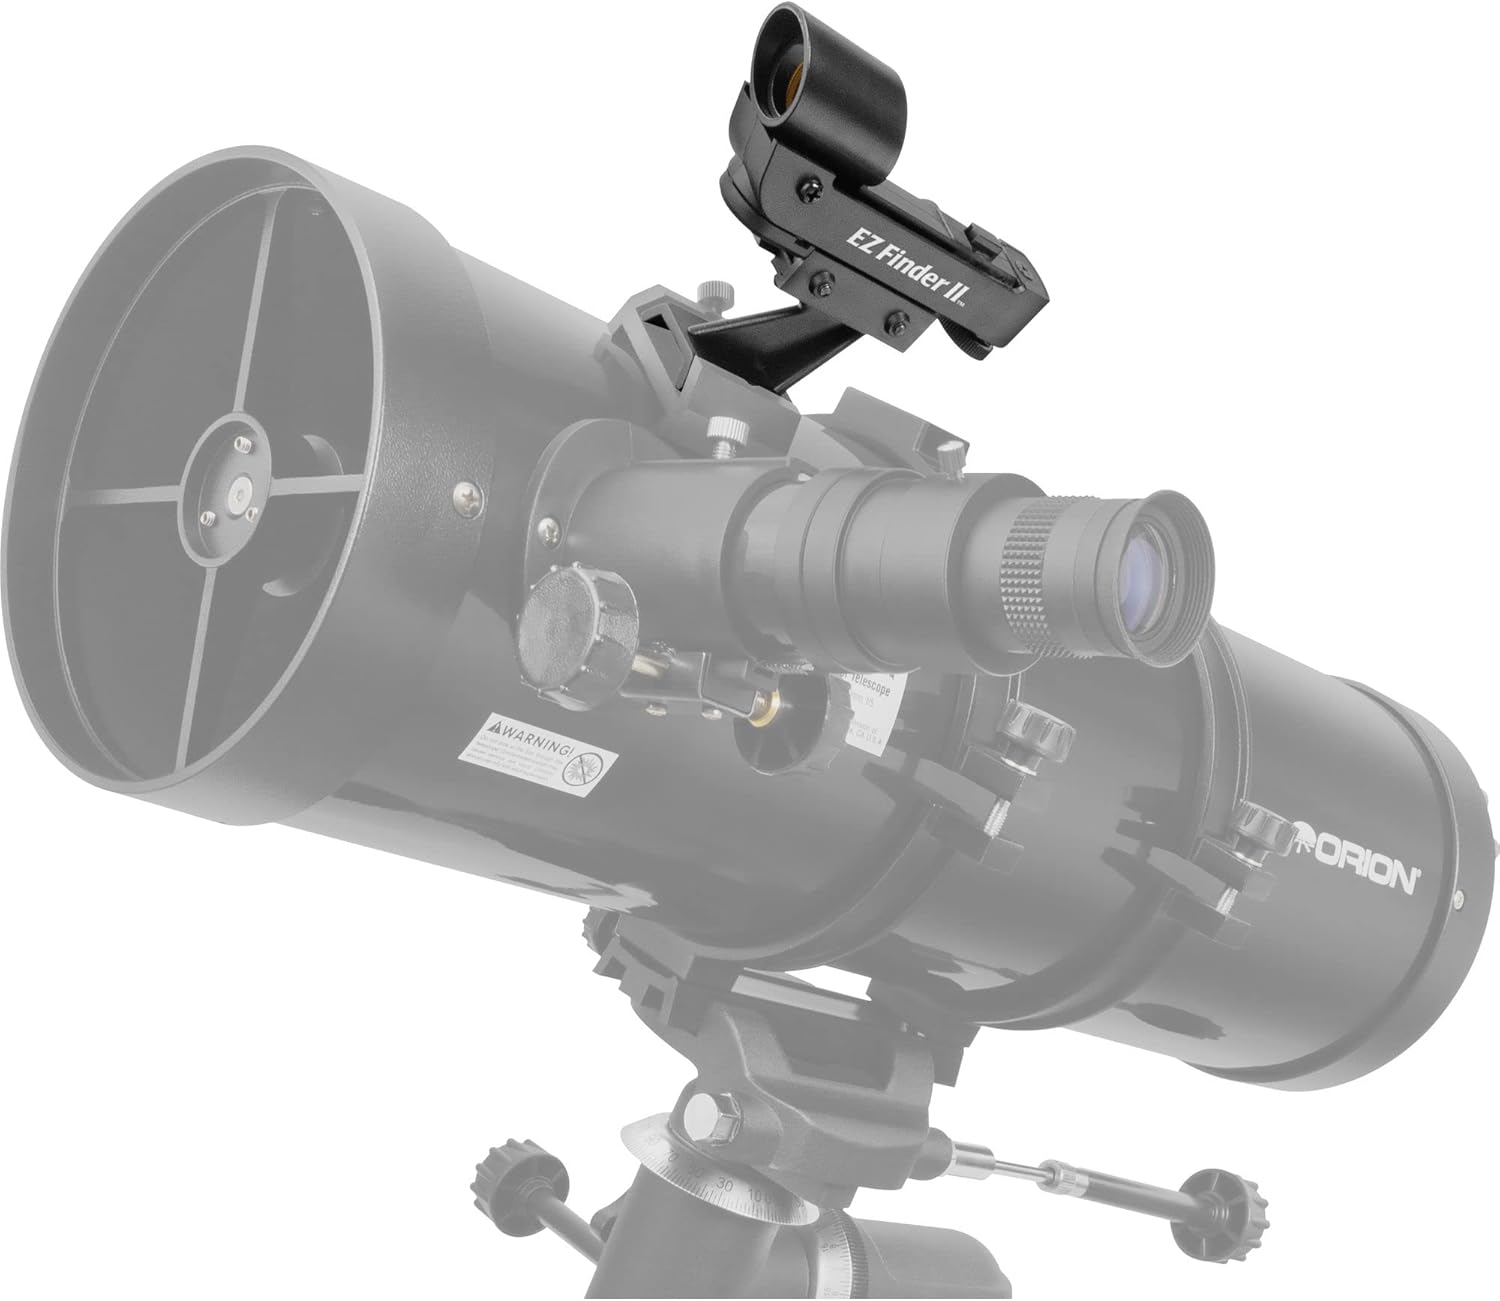
Figure 2: The EZ Finder II unit with its integrated dovetail bracket.
3. 설정
3.1. 배터리 설치
The EZ Finder II uses one CR-2032 3-volt lithium battery. If not already installed, locate the battery compartment, typically on the side or bottom of the unit. Insert the battery with the positive (+) side facing up. Close the compartment securely.
3.2. Mounting the EZ Finder II
The EZ Finder II comes with a dovetail bracket designed to fit the quick-release dovetail mounting base found on many Orion telescopes. This bracket provides sufficient height for clearance from the optical tube.
- Locate the dovetail mounting base on your telescope.
- Slide the EZ Finder II's dovetail bracket into the mounting base.
- Secure the bracket by tightening the thumbscrew on the mounting base. Ensure it is firm but do not overtighten.
For telescopes without a compatible dovetail mounting base, a separate dovetail base can be purchased from Orion or compatible retailers and installed on your telescope's optical tube.
4. 운영
4.1. Powering On and Adjusting Brightness
The EZ Finder II features an adjustable brightness control. A small knob or switch, usually located on the side of the unit, controls both power and brightness.
- Rotate the knob clockwise to turn the unit on and increase the brightness of the red dot.
- Rotate the knob counter-clockwise to decrease brightness and turn the unit off.
Adjust the brightness to a comfortable level that allows the red dot to be clearly visible without overpowering the background sky or target object.
4.2. Alignment Procedure
Before first use, or if the EZ Finder II has been removed and re-attached, it must be aligned with your main telescope. This ensures that where the red dot points, your telescope is also pointing.
- During daylight hours, point your main telescope at a distant, stationary object (e.g., a distant tree, telephone pole). Center the object in the eyepiece of your main telescope.
- Turn on the EZ Finder II and adjust the red dot brightness.
- Look through the EZ Finder II's viewing window. You will see the red dot superimposed on the background.
- Use the two small thumbwheels on the EZ Finder II to adjust the position of the red dot. One thumbwheel adjusts horizontal position, and the other adjusts vertical position.
- Adjust the thumbwheels until the red dot is precisely centered on the same distant object that is centered in your main telescope's eyepiece.
- Once aligned, the EZ Finder II is ready for use.
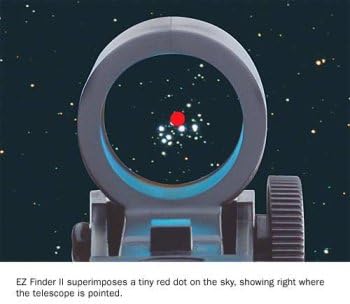
Figure 3: The red dot as seen through the EZ Finder II, indicating the telescope's target.
4.3. Using the EZ Finder II for Aiming
With the EZ Finder II aligned, aiming your telescope becomes intuitive:
- Look through the EZ Finder II's view잉 창.
- Move your telescope until the red dot is positioned directly over the celestial object you wish to observe.
- Once the red dot is on your target, the object should be within the field of view 주 망원경의 접안렌즈.
비디오 1: 오버view video demonstrating the features and usage of the Orion EZ Finder Deluxe Telescope Reflex Sight. Note that while this video refers to the 'Deluxe' model and mentions green reticle patterns, the core functionality for aiming and mounting is similar to the EZ Finder II.
5. 유지관리
5.1. 청소
유지하다 viewing window of your EZ Finder II clean for optimal performance. Use a soft, lint-free cloth, such as a microfiber cloth, to gently wipe away dust or smudges. Avoid using abrasive materials or harsh chemicals.
5.2. 배터리 교체
If the red dot becomes dim or fails to illuminate, it is likely time to replace the CR-2032 battery. Follow the battery installation steps (Section 3.1) to replace it.
5.3. 보관
When not in use, turn off the EZ Finder II to conserve battery life. Store the unit in a clean, dry place, preferably in its original packaging or a protective case, to prevent dust accumulation and accidental damage.
6. 문제 해결
| 문제 | 가능한 원인 | 해결책 |
|---|---|---|
| 빨간 점이 나타나지 않습니다. | 배터리가 소진되었거나 잘못 설치되었습니다. | 배터리 방향을 확인하십시오. 필요한 경우 배터리를 교체하십시오. |
| Red dot is too dim or too bright. | 밝기 설정이 잘못되었습니다. | Adjust the brightness control knob. |
| 빨간 점이 망원경의 초점과 일치하지 않습니다. view. | EZ Finder II needs alignment. | Perform the alignment procedure as described in Section 4.2. |
| Red dot appears blurry or distorted. | View창문이 더럽습니다. | 청소하다 view부드럽고 보풀 없는 천으로 창문을 닦으세요. |
7. 사양
| 특징 | 세부 사항 |
|---|---|
| 상표 | 오리온 |
| 모델 번호 | 7228 |
| 파인더스코프 유형 | 휘어진 |
| 전원 | 배터리 구동 |
| 배터리 유형 | 1 Lithium Metal (CR-2032), included |
| 품목 무게 | 85 Grams (2.8 oz) including bracket |
| 치수 | Approximately 4-3/4 inches long |
| 호환 장치 | Orion Telescopes with Dovetail Mounting Base |
8. 보증 및 지원
For specific warranty information and customer support, please refer to the official Orion web사이트를 방문하거나 고객 서비스에 직접 문의하세요. 보증 청구에 대비해 구매 증빙 자료로 구매 영수증을 보관하세요.
Orion Customer Service: www.telescope.com