
1. 서론
This manual provides detailed instructions for the setup, operation, and maintenance of your Sharp VC-H965U 4-Head Hi-Fi VCR. The VC-H965U is designed for recording and playback of VHS videocassettes, offering features such as a 4-head design for clear still-frame and slow-motion playback, hi-fi stereo sound, and Sharp Super Picture technology for enhanced image details. Please read this manual thoroughly before using your VCR to ensure proper operation and to maximize its performance.
2. 중요한 안전 정보
감전, 화재 또는 장치 손상을 방지하려면 다음 안전 예방 조치를 준수하세요.
- 감전 위험: Do not open the VCR casing. 모든 서비스는 자격을 갖춘 서비스 담당자에게 의뢰하세요.
- 전원: Connect the VCR only to an AC 120V, 60Hz power supply.
- 통풍: 장치 주변에 충분한 환기가 이루어지도록 하세요. 환기구를 막지 마세요.
- 수분: Do not expose the VCR to rain or moisture.
- Analog Broadcast Tuner: This television receiver has only an analog broadcast tuner. After February 17, 2009, it requires a converter box to receive over-the-air broadcasts with an antenna due to the U.S. transition to digital broadcasting. Analog-only TVs should continue to work as before with cable and satellite TV services, gaming consoles, VCRs, and DVD players.
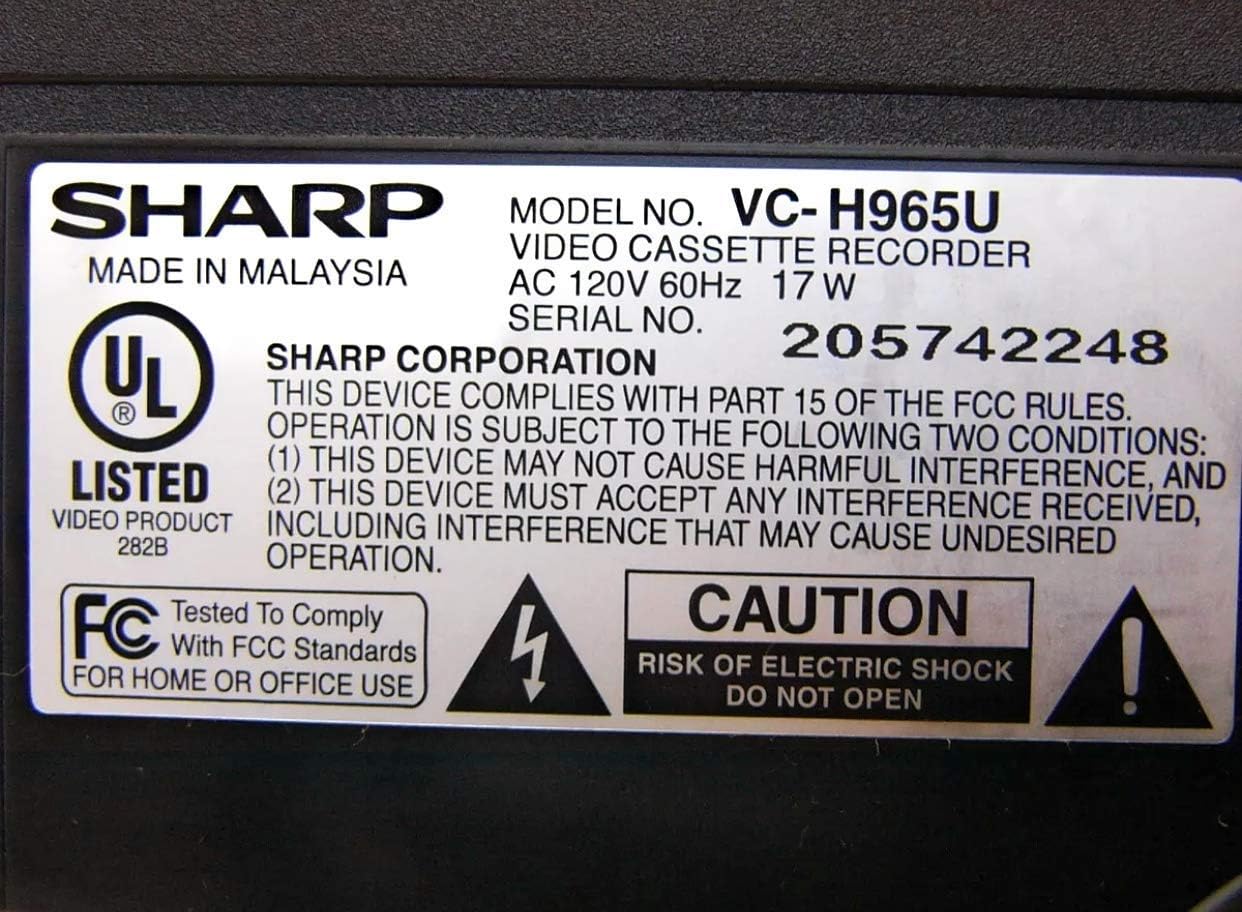
Figure 2.1: Product label with safety warnings and specifications.
3. 설정
3.1 포장 풀기 및 배치
Carefully remove the VCR from its packaging. Place the unit on a stable, flat surface, ensuring proper ventilation around all sides.

Figure 3.1: Front panel of the Sharp VC-H965U VCR.
3.2 Connecting to a Television and Other Devices
Connect the VCR to your television using appropriate audio/video cables. For optimal sound, use the stereo audio outputs to an AV receiver if available. The VCR also features front-panel AV inputs for easy connection of camcorders or gaming consoles.
- 비디오 연결: Connect the yellow VIDEO OUT jack on the VCR to the VIDEO IN jack on your TV.
- 오디오 연결: Connect the white AUDIO L OUT and red AUDIO R OUT jacks on the VCR to the corresponding AUDIO IN jacks on your TV or AV receiver.
- 안테나/케이블 연결: Connect your antenna or cable TV line to the VHF/UHF/CATV IN jack on the VCR. Then, connect the VHF/UHF/CATV OUT jack on the VCR to the antenna input on your TV.
- Front AV Inputs: For temporary connections like a camcorder, use the yellow VIDEO IN, white AUDIO L IN, and red AUDIO R IN jacks located on the front panel.

Figure 3.2: Rear panel connections of the Sharp VC-H965U VCR.

그림 3.3: 상세 view of rear AV and antenna connections.
3.3 Initial Setup and Channel Tuning (EZ Set Up)
The VC-H965U features an "EZ Set Up" function that automatically tunes and stores available channels. Follow these steps:
- Ensure the VCR is connected to your antenna or cable source.
- 비디오 플레이어와 텔레비전을 켜세요.
- Access the VCR's menu system (refer to your remote control for the "MENU" button).
- Select the "EZ Set Up" or "Auto Channel Search" option.
- The VCR will automatically scan and store all available air and cable channels, and set the clock.
메모: If you experience issues with picture loss after setting up cable channels, especially if you have a live signal on channel 3, consult the troubleshooting section or contact customer support for specific guidance.
4. 사용 설명서
4.1 기본 재생
- Insert a VHS videocassette into the VCR.
- 를 누르세요 놀다 VCR이나 리모컨의 버튼을 누르세요.
- 재생을 중지하려면 멈추다 단추.
- 재생을 일시 정지하려면 일시중지/정지 버튼을 누릅니다. 다시 누르면 다시 시작됩니다.
4.2 녹화 프로그램
- Insert a recordable VHS videocassette.
- Tune the VCR to the desired channel.
- 를 누르세요 기록 녹화를 시작하려면 버튼을 누르세요. 멈추다 녹음을 종료합니다.
- For timed recordings, use the VCR's timer programming function (refer to the remote control and on-screen menu for detailed steps).
4.3 고급 재생 기능
- Slow-Motion Playback: The 4-head design allows for smooth slow-motion playback in both forward and reverse. Use the 일시중지/정지 버튼을 누른 다음 FF or 리우 buttons to adjust speed.
- Clear Still-Frame: Achieve clear still images by pressing the 일시중지/정지 버튼을 재생합니다.
- 검색 건너뛰기: 재생 중에 검색 건너뛰기 button (if available on remote) to advance the tape in 30-second intervals, useful for bypassing commercials.
- 즉시 재생: 를 누르세요 즉시 재생 button (if available on remote) to quickly rewind the tape in 20-second intervals and then resume playback.
- Fast Rewind/Forward: The VCR rewinds a T-120 tape in approximately 54 seconds. Note that rewind speed may vary for other tape lengths.
5. 유지관리
5.1 VCR 청소
최적의 성능과 외관을 유지하려면:
- 비디오 플레이어 외부를 부드럽고 마른 천으로 닦으세요.
- 액체 또는 에어로졸 세척제는 마감재나 내부 부품을 손상시킬 수 있으므로 사용하지 마십시오.
- Avoid inserting cleaning tapes frequently, as some can cause excessive wear on the video heads. Use only when necessary and follow the cleaning tape manufacturer's instructions.
5.2 테이프 관리
Store videocassettes in their cases, away from direct sunlight, extreme temperatures, and magnetic fields, to preserve tape quality.
6. 문제 해결
If you encounter problems with your VCR, refer to the following common issues and solutions before seeking service.
| 문제 | 가능한 원인 / 해결책 |
|---|---|
| 전원이 없습니다 | Ensure the power cord is securely plugged into the VCR and a working electrical outlet. |
| 그림이나 소리가 나지 않습니다 |
|
| Poor picture quality (noisy, ghosty, dark) |
|
| VCR is noisy during rewind | This model may exhibit a slightly louder rewind function compared to some other VCRs. This is generally normal operation. |
| Picture loss after cable channel setup | If you have a live signal on channel 3, this can sometimes interfere with the auto-set process. Refer to the manual's specific section on channel tuning or contact Sharp customer service for assistance. |
7. 사양
- 상표: 날카로운
- 모델 번호: VC-H965U (Internal Model: VCA965U)
- 유형: 4-Head Hi-Fi VCR
- 전원 공급 장치: AC 120V, 60Hz, 17W
- 품목 무게: 약 5파운드
- 패키지 크기: 약 14.1 x 8.3 x 3.6인치
- Rewind Speed (T-120 tape): 약 54초
- 특징: Sharp Super Picture, 19 Micron Exact-Track heads, EZ Set Up, Skip Search, Instant Replay, Front-panel AV inputs.
- ASIN: B00006FXF5
- 첫 이용 가능 날짜: 29년 2005월 XNUMX일
8. 보증 및 지원
보증 정보는 구매 시 동봉된 설명서를 참조하거나 샤프 공식 웹사이트를 방문하십시오. website. If you require technical assistance or have questions not covered in this manual, please contact Sharp customer service. Previous users have noted the customer service staff to be very polite and helpful.
일반적으로 제조업체의 공식 지원 연락처 정보를 찾을 수 있습니다. website or by searching for "Sharp customer support" online.